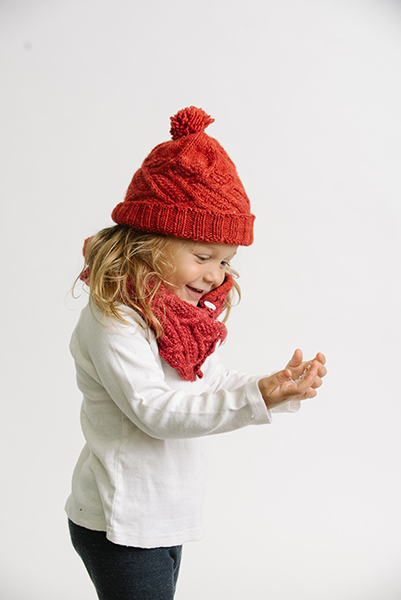
Originally published as the Willow River Hat and Willow River Cowl, the two finally come together in a matching set that’s perfect for the joyful season ahead. Bright white buttons complete the festive look. This set is made for an adult, but roll up the brim a bit and it looks great on little ones too.
Skill Level: Intermediate
Size: Circumference 20”/22” (unstretched/stretched) x height 9”
Gauge: 18 sts and 24 rows = 4” [10 cm] in St st after wet blocking
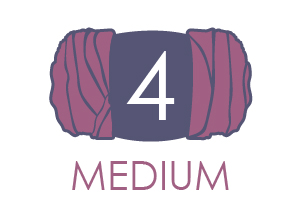
 Yarn: Malabrigo Yarn Worsted (100% Merino; 210 yards [192 meters]/100 grams): Ravelry Red (1 ball)
Needles: US size 6 (4 mm) 32” circular or DPNs, US size 8 (5 mm) 32” circular
Notions: Tapestry needle, marker, US size G/6 (4.0 mm) crochet hook, cable needle (optional)
Abbreviations
C4B (cable 4 back) – Sl 2 sts onto cn, hold in back, k2 from LH needle, k2 from cn.
C4F (cable 4 front) – Sl 2 sts onto cn, hold in front, k2 from LH needle, k2 from cn.
LLI – Left lifted increase
RLI – Right lifted increase
mmR2 – Stop 2 sts before your marker. Slip the 2 sts stitch from your left-hand needle to your right-hand needle, remove the stitch marker, slip the sts back from right-hand needle to left-hand needle, and place the marker on your right-hand needle. Your stitch marker will now be shifted 2 sts to the right.
mmL2 – Remove the marker from the left-hand needle, k2, and place the marker on the right-hand needle. Your stitch marker will now be shifted 2 sts to the left.
Pattern Notes
The hat is worked top down in the round, beg with the Emily Ocker circular cast on. The pattern is both written and charted.
Pattern
CO 8 sts on a crochet hook using the Emily Ocker cast on. Transfer the sts to the smaller sized circular needle or 2 DPNs.
Split the 8 sts equally across the two ends of the circular needles or the 2 DPNs (4 sts on each needle).
Setup
Rnd 1: Knit, PM for beg of rnd on the first st. (8 sts)
Rnd 2: *Kfb; rep from * around. (16 sts)
Rnd 3: Knit.
Rnd 4: *K4, pm; rep from * to last 4 sts, k4,
Note: You will now use lifted increases to shape the crown. You will increase by 8 sts every alternate round.
Switch to larger sized needles and work the crown shaping as follows:
Rnd 5: *K1, RLI, k to 1 st before m, LLI, k1, sm; rep from * to end of rnd. (8 sts inc’d; 24 sts)
Rnd 6: Knit.
Rep Rnds 5-6, 9 more times. (96 sts)
Remove all markers except beg of rnd marker. Your crown shaping is now complete.
Next Rnd: Remove beg of rnd marker, k7, pm for new BOR.
Next Rnd: Knit.
Using the written or charted instructions, work the hat as follows:
Rnd 1: *K2, c4b, k2, p1, k1, p1, k1; rep from * around.
Rnd 2: *K7, p1, k1, p1, k2; rep from * around.
Rnd 3: *C4b, k2, p1, k1, p1, k3; rep from *.
Rnd 4: *K5, p1, k1, p1, k4; rep from * to last 2 sts, mmR2.
Rnd 5: *C4b, k2, p1, k1, p1, k3; rep from * to beg of rnd, mmL2
Rnd 6: *K5, p1, k6; rep from * around.
Rnd 7: *C4f, k4, c4b; rep from * around.
Rnd 8: Knit.
Rnd 9: *K2, c4f, c4b, k1, p1; rep from * around.
Rnd 10: *P1, k9, p1, k1; rep from * around.
Rnd 11: *K1, p1, k2, c4f, k3, p1; rep from *.
Rnd 12: *P1, k1, p1, k9; rep from *.
Rnd 13: *K1, p1, k1, p1, k2, c4f, k2; rep from * around.
Rnd 14: *K2, p1, k1, p1, k7; rep from * around.
Rnd 15: *K3, p1, k1, p1, k2, c4f; rep from * around.
Rnd 16: *K4, p1, k1, p1, k5; rep from * to last 2 sts, mmR2.
Rnd 17: *C4f, k3, p1, k1, p1, k2; rep from * to beg of rnd, mmL2.
Rnd 18: *K6, p1, k5; rep from * around.
Rnd 19: *C4f, k4, c4b; rep from * around.
Rnd 20: K
Rnd 21: *P1, k1, c4f, c4b, k2; rep from * around.
Rnd 22: *K1, p1, k9, p1; rep from * around.
Rnd 23: *P1, k3, c4b, k2, p1, k1; rep from * around.
Rnd 24: *K9, p1, k1, p1; rep from * around.
Bottom Ribbing
Switch to smaller needles.
Next Rnd: P2, *k2, p2; rep from * to last 2 sts, k2.
Continue ribbing for about 1.5” or to desired length.
BO all sts using the Stretchy 2×2 Rib Method as follows:
Step 1: P2 sts, insert left needle into the back of the 2 sts you just worked, wrap the front needle and p2tog.
Step 2: K1 st, insert the left needle into the front of the 2 sts you just worked, wrap the back needle and k2tog tbl.
Step 3: Rep Step 2.
Step 4: P1 st, insert left needle into the back of the 2 sts you just worked, wrap the front needle and p2tog.
Step 5: Rep Step 4
Rep Steps 2-5 until you have bound of all sts.
Finishing
Weave in ends.
Add a pompom if you’d like.
Cowl
Skill Level: Intermediate
Size: 26” circumference x 10” height
Gauge: 18 sts and 24 rows = 4” [10 cm] in St st after wet blocking
Materials
 Yarn: Malabrigo Yarn Worsted (100% Merino; 210 yards [192 meters]/100 grams): Ravelry Red (2 balls)
Needles: US size 7 (4.5 mm) 32” circular
Notions: Markers, removable markers, stitch holders, cable needle (optional), tapestry needle, sewing thread, six 0.5” (12.7mm) buttons
Abbreviations
C3B (cable 3 backwards) – Sl 1 st onto cn, hold in back, k2 from LH needle, k1 from cn.
C3F (cable 3 forwards) – Sl 2 sts onto cn, hold in front, k1 from LH needle, k2 from cn.
C4B (cable 4 backwards) – Sl 2 sts onto cn, hold in back, k2 from LH needle, k2 from cn.
C4F (cable 4 forwards) – Sl 2 sts onto cn, hold in front, k2 from LH needle, k2 from cn.
Pattern Notes
The cowl is worked flat in one piece beg with an I-cord Cast-On and fastened with buttons. The first and last 4 sts of every row are worked in Garter St. The buttonholes are worked at the beginning of the 7th and 19th rows, and the instructions for working the buttonholes are included as part of the row instructions (both written and charted).
Pattern
Using I-cord Cast-On, CO 132 sts (this includes the 4-st garter border at each end).
Using the written or charted instructions, work the cowl as follows:
Row 1 (RS): K6, p1, k1, *k2, c4b, k2, p1, k1, p1, k1; rep from * until last 4 sts, k4.
Row 2 (WS): K4, *p2, k1, p1, k1, p7; rep from * until last 8 sts, p2, k1, p1, k4.
Row 3: K8, *c4b, k2, p1, k1, p1, k3; rep from * until last 4 sts, k4.
Row 4: K4, *p4, k1, p1, k1, p5; rep from * until last 8 sts, p4, k4.
Row 5: K6, *c4b, k2, p1, k1, p1, k3; rep from * until last 6 sts, k6.
Row 6: K4, *p6, k1, p5; rep from * until last 8 sts, p4, k4.
Row 7: K2, yo, k2tog, k1, c3b, *c4f, k4, c4b; rep from * until last 4 sts, k4.
Row 8: K4, p until last 4 sts, k4.
Row 9: K7, p1, *k2, c4f, c4b, k1, p1; rep from * until last 4 sts, k4.
Row 10: K4, *p1, k1, p9, k1; rep from * until last 8 sts, p1, k1, p2, k4.
Row 11: K7, p1, *k1, p1, k2, c4f, k3, p1; rep from * until last 4 sts, k4.
Row 12: K4, *p9, k1, p1, k1; rep from * until last 8 sts, p4, k4.
Row 13: K8, *k1, p1, k1, p1, k2, c4f, k2; rep from * until last 4 sts, k4.
Row 14: K4, *p7, k1, p1, k1, p2; rep from * until last 8 sts, p4, k4.
Row 15: K5, c3f, *k3, p1, k1, p1, k2, c4f; rep from * until last 4 sts, k4.
Row 16: K4, *p5, k1, p1, k1, p4; rep from * until last 8 sts, p4, k4.
Row 17: K6, *c4f, k3, p1, k1, p1, k2; rep from * until last 6 sts, k6.
Row 18: K4, *p5, k1, p6; rep from * until last 8 sts, p4, k4.
Row 19: K2, yo, k2tog, k1, c3b, *c4f, k4, c4b; rep from * until last 4 sts, k4.
Row 20: K4, p until last 4 sts, k4.
Row 21: K8, *p1, k1, c4f, c4b, k2; rep from * until last 4 sts, k4.
Row 22: K4, *k1, p9, k1, p1; rep from * until last 8 sts, k1, p3, k4
Row 23: K6, p1, k1, *p1, k3, c4b, k2, p1, k1; rep from * until last 4 sts, k4.
Row 24: K4, *k1, p1, k1, p9; rep from * until last 8 sts, k1, p1, k1, p1, k4.
Rep Rows 1-24 twice more.
BO all sts using the I-cord Bind-Off method.
Finishing
Sew on buttons opposite the buttonholes.
Weave in ends and wet block your Cowl.

