Rosaleen (an Irish name meaning Little Rose) is a lightweight summer t-shirt inspired by the blossoming flowers of a rose garden. Adorned with tiny embroidered roses,create your own tiny rose garden with this intriguing design.
Time: Weekend Project
Skill Level: Intermediate
Size: Finished Bust Size 32 (34, 38, 40) to fit bust (28 (31.5, 35.5, 39.5)“ [72 (80, 90, 100) cm]
1-2” positive ease recommended. Shown in size 32”. See schematic for details.
Gauge: with larger needles 28 sts and 32 rows = 4” [10 cm] in St st after wet blocking
Materials
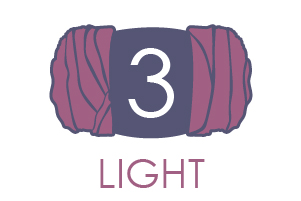
 Yarn: Drops Baby Alpaca Silk (70% Alpaca, 30% Silk 183 yards [167 meters]/50 grams): 8108 Light Grey (MC, 3 (4, 5, 6) balls), 3250 Light Old Pink (CC, 1 ball needed for all sizes)
Needles: US size 6 (4.0 mm) 24” straight and circular needles, set of DPNS or whatever size allows you to reach gauge.
US size 3 (3.0 mm) 24” straight and circular needles, set of DPNS.
Notions: 4 Markers, stitch holders or waste yarn, waste yarn for provisional cast-on, tapestry needle, One 1-inch button, embroidery thread in red, green, purple and lemon, embroidery needle.
Downloads
Abbreviations
Kfb: knit into front and then back of same stitch to inc 1 st.
Special Stitches
I-cord cast on: CO 3 sts, *kfb, k2. Slip 3 sts back to LH needle; rep from * until you have desired amount of sts.
I-cord bind off: CO 3 sts, *k2, k2tog-tbl, (this is the last st of the cast on and the first st of the live sts) sl3 sts back to LH needle; rep from * as directed.
I-cord: CO 3 stitches onto DPN. Knit these 3 sts. *Slide the sts back to the right side of the DPN. Keeping the yarn at the back, k these three sts. Rep from * until your i-cord is the desired length.
German short rows (SR): I use the German method of creating short rows in the cardigan, please use whichever method you prefer. If you are working the “wrap and turn”, work this at the turning point, and ignore the “SR” instruction at the start of the following row. And then work the wrapped stitches together with their wraps as you come to them.
SR: Bring yarn to the front. Sl St p-wise and bring yarn up, over and back to pull on the slipped stitch until it slides around to show two legs. Keeping the yarn at the back in order to k next st while keeping the tension. On the WS, keep yarn at the front to purl next st.
Continue in patt. When working the stitch the next time you meet it, work the “double stitch” i.e. the two legs, as one stitch.
Pattern Notes
An adult sized t-shirt, knit from the top down in the round. The t-shirt starts with a contrasting i-cord cast on and is then knit flat for several rows to create the placket while incorporating raglan shaping for the sleeves. After the back opening has been created, the t-shirt is joined and worked in the round. When the yoke is the desired length, stitches are set aside for the short length sleeves, before the body of the t-shirt is knit in stocking stitch. Short rows shape the bottom before an icord edge finishes the t-shirt. The sleeves are finished with icord bind-off in a contrasting color. The back opening is the completed with an applied icord edging and buttonhole. Embroidery roses and leaves are added to the top right and bottom of the t-shirt.
Pattern
Neck opening:
With the smaller needles and CC, cast on 115 (119, 123, 127) sts using the icord cast on method.
Place final 3 sts on yarn holder or waste yarn. Break yarn.
Row 1 (WS): With MC and larger needles, p next 112 (116, 120, 124) sts. (112 (116, 120, 124) sts)
Row 2 (RS): K18 (19, 19, 20), pm, k19 (20, 21, 21), pm, k38 (38, 40, 42), pm, k19 (20, 21, 21), pm, K18 (19, 19, 20)
These markers indicate divisions between right back, right sleeve, front, left sleeve, and left back sections.
Row 3: Purl.
Row 4: [K to 2 sts before m, kfb, k1, sm, kfb] 4 times, k to end. (8 sts inc) (120 (124, 128, 132) sts)
Rep row 3 and 4: 7 more times. (176 (180, 184, 188) sts)
Join in the rnd:
Rnd 1: CO 1 st at the end of the previous row. Pm to mark beg of rnd. CO 1 st. Join for working in the round, being careful not to twist your work. (178 (182, 186, 190) sts)
Rnd 2: Knit.
Rnd 3: [K to 2 sts before m, kfb, k1, sm, kfb] 4 times, k to end of rnd. (8 sts inc) (186 (190 194, 198) sts)
Rep last two rnds 19 (21, 24, 28) times. (338 (358, 386, 422) sts)
Divide arms and body
Rnd 1: K to first marker, place the sts between markers 1 and 2 on yarn holders for sleeve 1. Remove markers. CO 4 sts and pm between 2 and 3 of CO sts, k to next marker, place the sts between markers 3 and 4 on yarn holders for sleeve 2, CO 4 sts and pm between 2 and 3 of CO sts. K to end. 194 (204, 218, 238) sts left on needles for main body) (75 (80, 87, 95) sts remain on each yarn holder for each sleeve.)
Rnd 2: [K to 1 st before marker, p1, sm, p1] twice, k to end.
Work in est pattern until t-shirt measures, 19 (20, 22, 24)” or 48 (50, 56, 61) cm or desired length.
Short row shaping
Set up row: K to 1 st before marker P1, sm. This marker marks beg of row.
Front
Row 1 (RS): K3, pm, k to 4 sts before marker, turn.
Row 2: SR, p to 3 sts before marker, turn.
Row 3: SR, k until 3 sts before last turn, turn.
Row 4: SR, p until 3 sts before last turn, turn.
Rep Rows 3-4 a further 11 (13, 15, 17) times.
Next Row (RS): SR, k to 1 st before marker, working all double sts as one st as you come to them, p1.
Row 2: K to 1 st before second marker, working all double sts as one st as you come to them, p1.
Back
Row 1 (RS): K3, pm, k to 4 sts before marker, turn.
Row 2: SR, p to 3 sts before marker, turn.
Row 3: SR, k until 3 sts before last turn, turn.
Row 4: SR, p until 3 sts before last turn, turn.
Rep Rows 3-4 a further 13 (15, 19, 21) times.
Next Row (RS): SR, k to 1 st before marker, working all double sts as one st as you come to them, p1.
Row 2: K to 1 st before second marker, working all double sts as one st as you come to them, p1.
I-cord Bind Off edging.
Work i-cord BO all along the bottom edge of the t-shirt with larger needles.
When 3 sts rem, break yarn, thread onto tapestry needle and pull through 3 sts and secure. Sew cast on edge to bind off edge using a swiss darning or duplicate st for a neat edge.
Sleeves
Work both sleeves in the same way.
Return (75 (80, 87, 95)) sts to needles.
CO 2 sts, k75 (80, 87, 95) sts, CO 2 sts, pm to mark beg of rnd. (79 (84, 91, 99) sts)
Rnd 1: P1, k to 1 st before marker, p1.
Rep rnd 1 5 (5, 7, 7) more times.
Break yarn.
I-cord Bind Off edging.
With CC work i-cord BO all along the bottom edge of the t-shirt with larger needles.
When 3 sts rem, break yarn, thread onto tapestry needle and pull through 3 sts and secure. Sew cast on edge to bind off edge using a Swiss darning or duplicate st for a neat edge.
Back opening:
Place three sts on back on to a larger size dpns and rejoin CC.
Slide the sts back to the right end of your needle.
Knit 3 sts,
Pick up 1 st from edge of back opening.
*Slide all 4 sts to the back to the right end of your needle.
Keeping the working yarn in the back, k 2 sts, then k2tog, (i.e. the third stitch and the st you picked up) pick up 1 st from edge of yarn opening.
Rep from * 30 more times, working around the opening gap until you reach the opposite i-cord cast on edge.
Work i-cord for ten rows.
Break yarn, thread onto tapestry needle and pull through 3 sts and secure. Make a loop with the i-cord tail. Sew cast on edge i-cord CO edge using a Swiss darning or duplicate st for a neat edge.
Finishing
Weave in ends and block to dimensions given in table.
Pay particular attention to where you separated the body from the sleeves as there may be a small hole that needs closing.
Add button to back placket using matching yarn or thread.
When t-shirt is dry, decorate using embroidery roses, leaves and French knots.
See layout sheet and photographs for details.


How do I order some sweaters from the new Spring Collection?
Hi! These sweater patterns are available to Gold Members of of I Like Knitting. Finished sweater samples are not for sale. Please let me know if you have any questions! – Nicola, Editor
Where can I find instructions to make the embroidered roses?
Hello! Charts are always on the far right side of the pattern page underneath the photos. Here are direct links to the charts as well:
https://www.ilikeknitting.com/wp-content/uploads/Rosaleen-Embroidered-Tee-Embroidery.pdf
https://www.ilikeknitting.com/wp-content/uploads/Rosaleen-Embroidered-Tee-Schematic.pdf
Thanks! – Nicola, Editor