Skill Level: Advanced
Size: child (s, m, l)
Finished measurements
Chest: 31½ (36¾, 39½, 41¾) in / 80 (93, 100, 106) cm
Length: 19¾ (23, 24½, 24¾) in / 50 (60, 62, 63) cm
Materials
Yarn: cyca #3 (sport) östergötlands ullspinneri visjö (100% wool, 328 yd/300 m / 100 g)
Yarn amount and color: 3 (4, 4, 5) skeins, olive green
Needles u.s.
Skill Level: Advanced
Size: child (s, m, l)
Finished measurements
Chest: 31½ (36¾, 39½, 41¾) in / 80 (93, 100, 106) cm
Length: 19¾ (23, 24½, 24¾) in / 50 (60, 62, 63) cm
Materials
 Yarn: cyca #3 (sport) östergötlands ullspinneri visjö (100% wool, 328 yd/300 m / 100 g)
Yarn amount and color: 3 (4, 4, 5) skeins, olive green
Needles u.s. size 2.5 / 3 mm: 24 in / 60 cm for child’s size, 32 in / 80 cm for adult sizes + 1 extra for joining, set of 5 dpn for sleeves, u.s. size 1.5 / 2.5 mm: 16 in / 40 cm circular, cable needle
Notions: stitch markers
Gauge
25 sts in st st on u.s. size 2.5 / 3 mm needles = 4 in / 10 cm. Adjust needle size to obtain correct gauge if necessary.
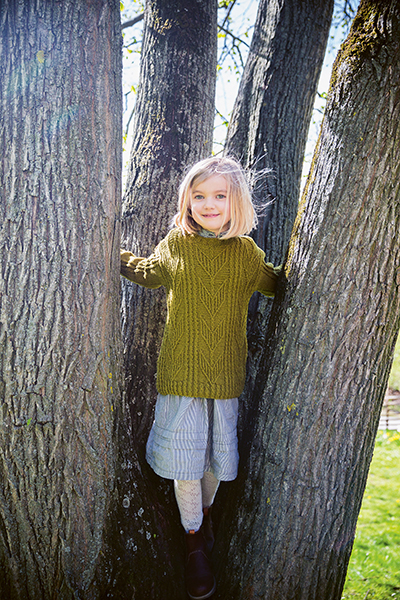
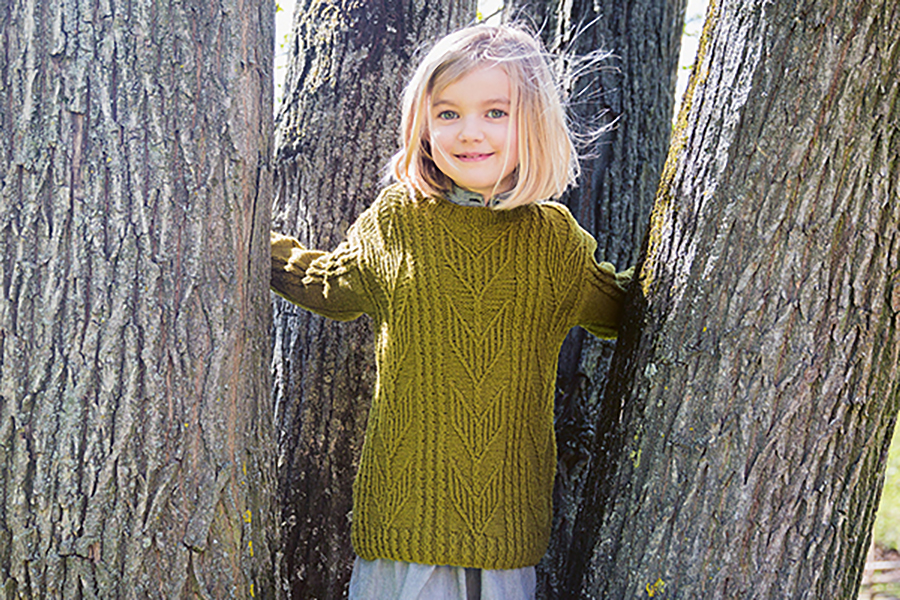
It seems like everyone sees something different in this pattern: arrowheads, tulips, and fox heads are some of the suggestions I’ve gotten. The pattern is worked with twisted stitches against a reverse stockinette background to heighten the relief effect. I’ve knitted many variations of it—the first time was on a sweater for my mother, about 20 years ago.
The sweater is constructed so the narrow cables on the lower edge either continue as a group or transition into other patterns. The half repeats, which end at the front and back pieces, also transform into a new block pattern over the shoulders. The neck is shaped with short rows so you can continue with the “resting” stitches and the pattern flows naturally to the ribbed edge. I love it when everything works out smoothly!
Pattern Notes
All the knit stitches on the chart are twisted (worked through the back loop) but I refrained from marking each with a special symbol. Twisting is easier on knit rather than purl stitches, so this sweater is worked in the round as much as possible.
The neckband is the only place without twisted knit stitches, because it needs extra elasticity. Of course, you can work the design without any twisted stitches, but that will affect the gauge enough that the sizing will change.
Narrow cables are quite easy to knit without a cable needle! With the needle behind the first stitch, knit the second stitch into the back loop but do not drop it off the needle. Knit the first stitch through the back loop and then slide both stitches off the needle.
Pattern
Back and Front
With U.S. size 2.5 / 3 mm circular, CO 208 (240, 256, 272) sts. Join, being careful not to twist cast-on row. Pm for beginning of rnd. Work following Chart A.
Sizes Child and S: Work Rows 1-15 of chart.
Size M: Work Rows 1-4 of chart and then Rows 1-15. Size L: Work Rows 1-8 of chart and then Rows 1-15. Work Row 16 and then follow Chart A as below (de-pending on chosen size)
Child: *Work sts 1-40, 9-40, 9-40*; rep * to * = 5 cables on each side and 3 between arrows.
S: Work sts 1-40 6 times = 5 cables on each side and 5 between arrows.
M: *Work sts 1-8, 1-40, 1-40, 1-40*; rep * to * = 7 cables on each side and 5 between arrows.
L: *Work sts 1-16, 1-40, 1-40, 1-40*; rep * to * = 9 cables on each side and 5 between arrows.
Continue, following the chart through Row 47. Rep Rows 16-47 until piece measures 13 (14¼, 14½, 15) in / 33 (36, 37, 38) cm. Now divide for back and front. Make sure the last row is an odd-numbered row so the cables cross on the RS as before. Cut yarn.
Divide Front and Back
There is a group of 5 (5, 7, 9) cables at each side. BO the center 10 (10, 10, 18) sts at each side for the armhole shaping = 3 (3, 3, 5) cables and the purl sts between them.
Begin at the front: CO 2 sts for edge sts, work follow-ing chart on RS and end by casting on 2 edge sts = 98 (114, 122, 122) sts rem. The edge sts will be used for seaming and are worked the same way on both RS and WS: Sl 1 purlwise wyf, k1; end row with k2 edge sts. Work as est until there are 4 (5, 5, 5) complete arrows; end with Row 47.
Neck shaping: Shape neck with short rows (see pages 136-137) and following Chart B (C, C, C). Pm around the center 20 (36, 36, 36) sts.
On RS: Work to marker; turn and work back. The slipped st is indicated with ₵ on the chart. Continue short row shaping on every other row as est until you’ve worked all the rows on the chart.
NOTE: Due to space restrictions, not all of the sts for the front are included on the chart—just enough so you can see where the turns occur = 26 (26, 30, 30) sts.
Do not BO, but, place rem sts on a holder. Shape the other side the same way, reversing shaping to correspond.
Work the back as for the front until there are 4 (5, 5, 5) complete arrows. Work another 8 rows (Rows 16-23 of Chart A). Pm around the center 36 (52, 52, 52) sts. Work short row shaping as for front, but follow Chart D (E, E, E). As for front, the charts do not include all the sts for the back—just enough so you can see where the turns occur = 26 (26, 30, 30) sts. Do not BO; leave sts on needle for joining shoulders. Shape the other side the same way, reversing shaping to correspond. Leave rem sts on needle.
Joining Shoulders
Place back and front with RS facing RS and join with 3-needle bind-off. Use an extra needle to k2tog with the first st from each needle; *join next st on each needle with k2tog and then pass st at right on right needle over left st (see page 134). Continue the same way from * until all 26 (26, 30, 30) sts have been bound off at each shoulder. Cut yarn and draw end through rem st. Join opposite shoulder the same way.
Neckband
In my experience, it’s a good idea to work the neckband before knitting the sleeves so you can try on your work and make sure it’s the right size at a relatively early stage.
With RS facing and smaller circular, at left shoulder seam, pick up and knit 2 sts; work (p2, k2) across front. Pick up and knit 2 sts in right shoulder seam; (p2, k2) across back. Work a total of 6 (6, 8, 8) rnds k2, p2 ribbing and then BO.
Sleeves (Make Both Alike)
With larger dpn, CO 56 (56, 64, 64) sts. Divide sts evenly onto 4 dpn; join, being careful not to twist cast-on row.
Work sleeve cuff following Rows 1-12 + 1-3 (1-12 + 1-3, 1-12, + 1-7, 1-12 + 1-7) of Chart A. Now begin sleeve shaping and following Chart F for St st sections.
Sizes M and L: Rep the section outlined in red once.
Increase with yarnovers, purling yarnovers through back loop on next rnd.
Continue working Chart F, increasing on every 8th (6th, 6th, 6th) rnd, with 1 st between the single cable to underarm until there are 80 (108, 116, 116) sts total. Make sure the sleeve fits well into the armhole—adjust shaping as necessary.
After completing increases, work without further shaping until sleeve is approx. 11¾ (17, 17¾, 18½) in / 30 (43, 45, 47) cm long or desired length minus 5∕8 (5∕8, 5∕8, 1¼) in / 1.5 (1.5, 1.5, 3) cm. BO 2 st (= cable) and work another 5∕8 (5∕8, 5∕8, 1¼) in / 1.5 (1.5, 1.5, 3) cm back and forth for finishing at armhole. End with a couple of rows in St st for seaming.
BO relatively loosely so the sleeve doesn’t draw in.
Finishing
Attach sleeves. Weave in all ends neatly on WS. Gently wash sweater in lukewarm water with wool-safe soap. Block by patting or pinning out garment to finished measurements; leave until completely dry.


Beautiful sweater!!!