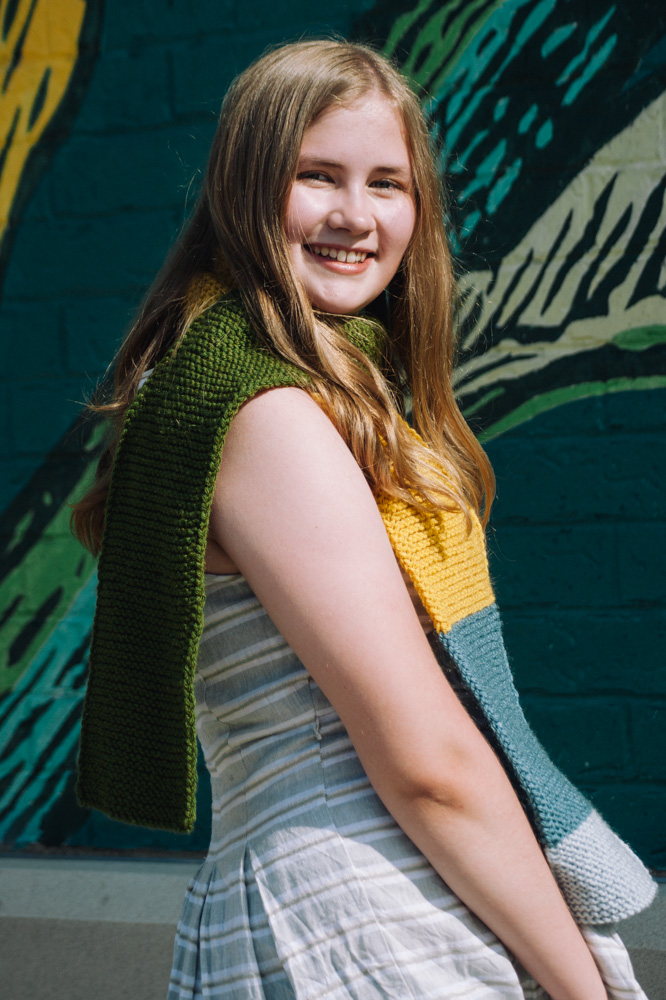
Simple is the name of the game and you’ll knit this scarf in no time at all. Great for scraps and for teaching new knitters, the chunks of color give off a modern vibe. Wrap this scarf a different way each time you wear it to highlight a different color!
Time: Weekend Project
Skill Level: Beginner
Size: 5.5” wide x 60” long
Gauge: 8 sts and 14 rows = 2” [5 cm] in Garter st
Materials
 Yarn: Lion Brand Vanna’s Choice (100% Acrylic; 170 yards [156 meters]/100 grams]: 860174 Olive (MC, 1 ball), 860158 Mustard (C1, 1 ball), 860108 Dusty Blue (C2, 1 ball), 860105 Silver Blue (C3, 1 ball)
Needles: US Size 10 (6.0mm)
Notions: Tapestry needle.
Pattern Notes
Used long tail cast on and standard bind off.
Tips for Beginners
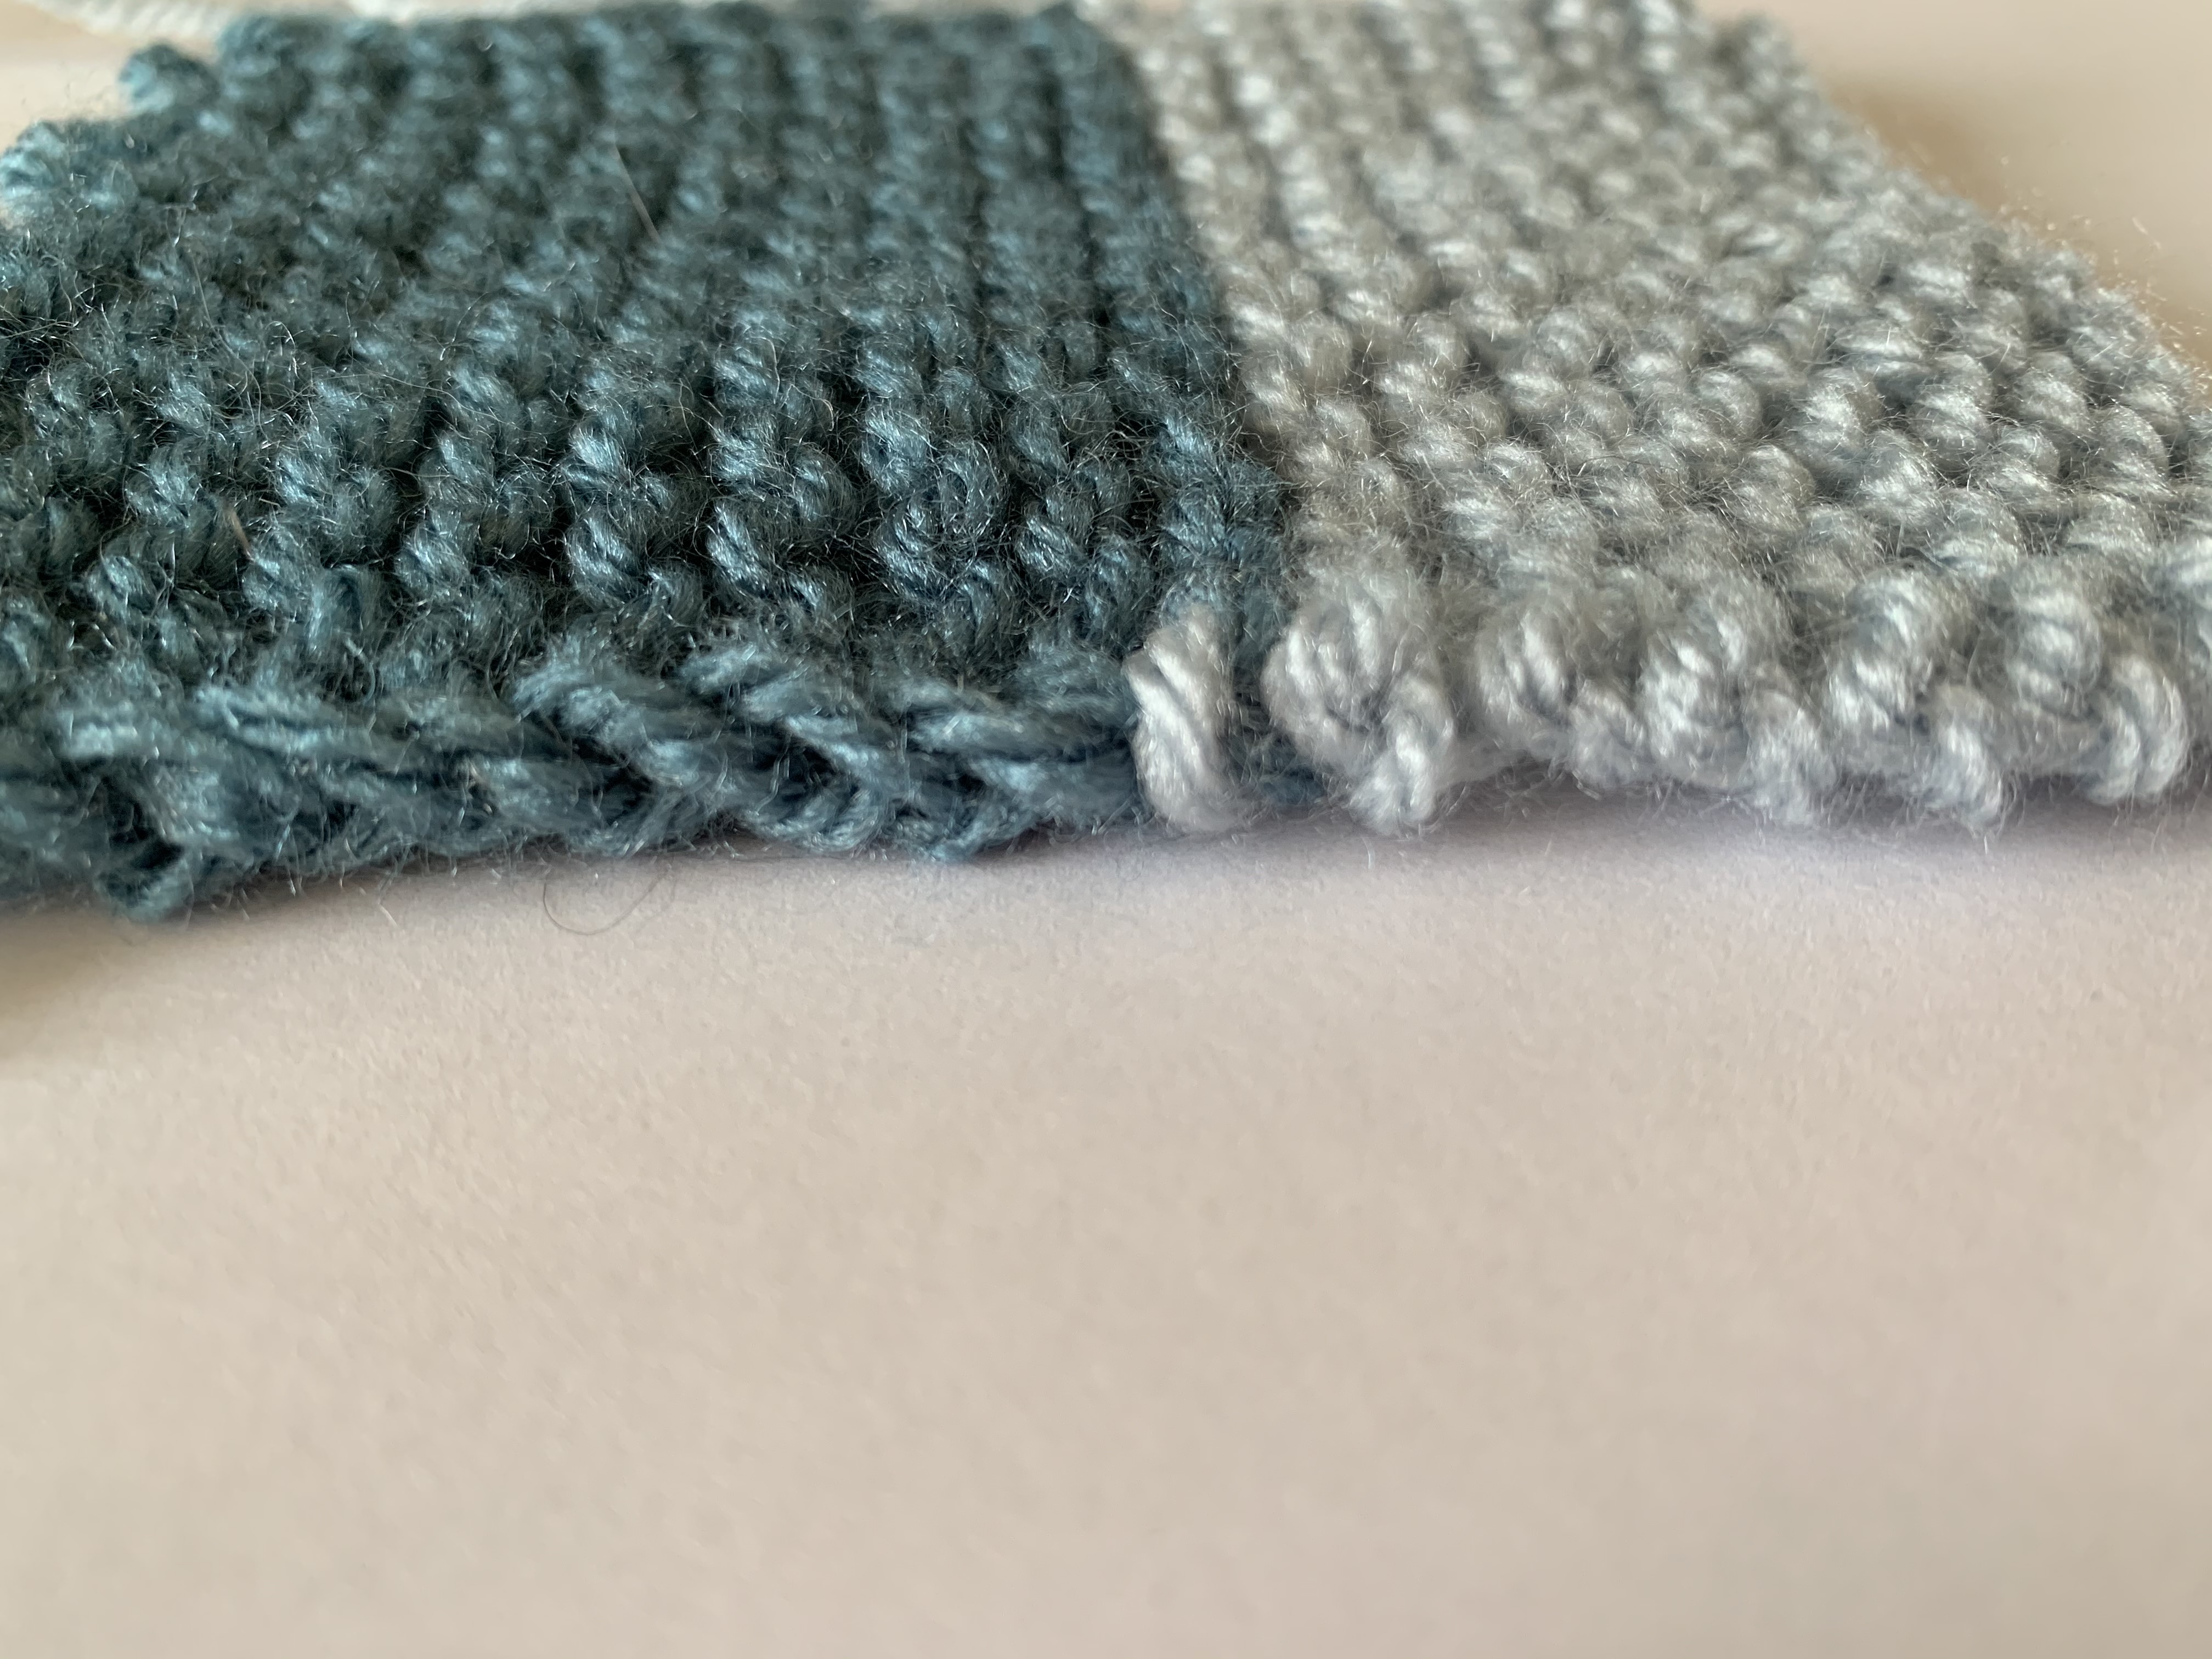
A beautiful scarf can be made by knitting every stitch (known as Garter Stitch). The sides of such a project will have a wrapped yarn look (as seen in the lighter blue).
(right side/front of work)

If you make two small variations, you can give the scarf a crisp “V” edge that looks similar to the top and bottom edges of the scarf (as seen in the darker blue). To accomplish this:
- Work the first stitch of every row as a Slip 1 knitwise (sl1k) which means that you insert your needle under the first stitch as if to knit, but then just slide it onto the empty needle without actually wrapping the yarn and working the stitch.
- Work the last stitch of every row as a Purl.
Changing Color
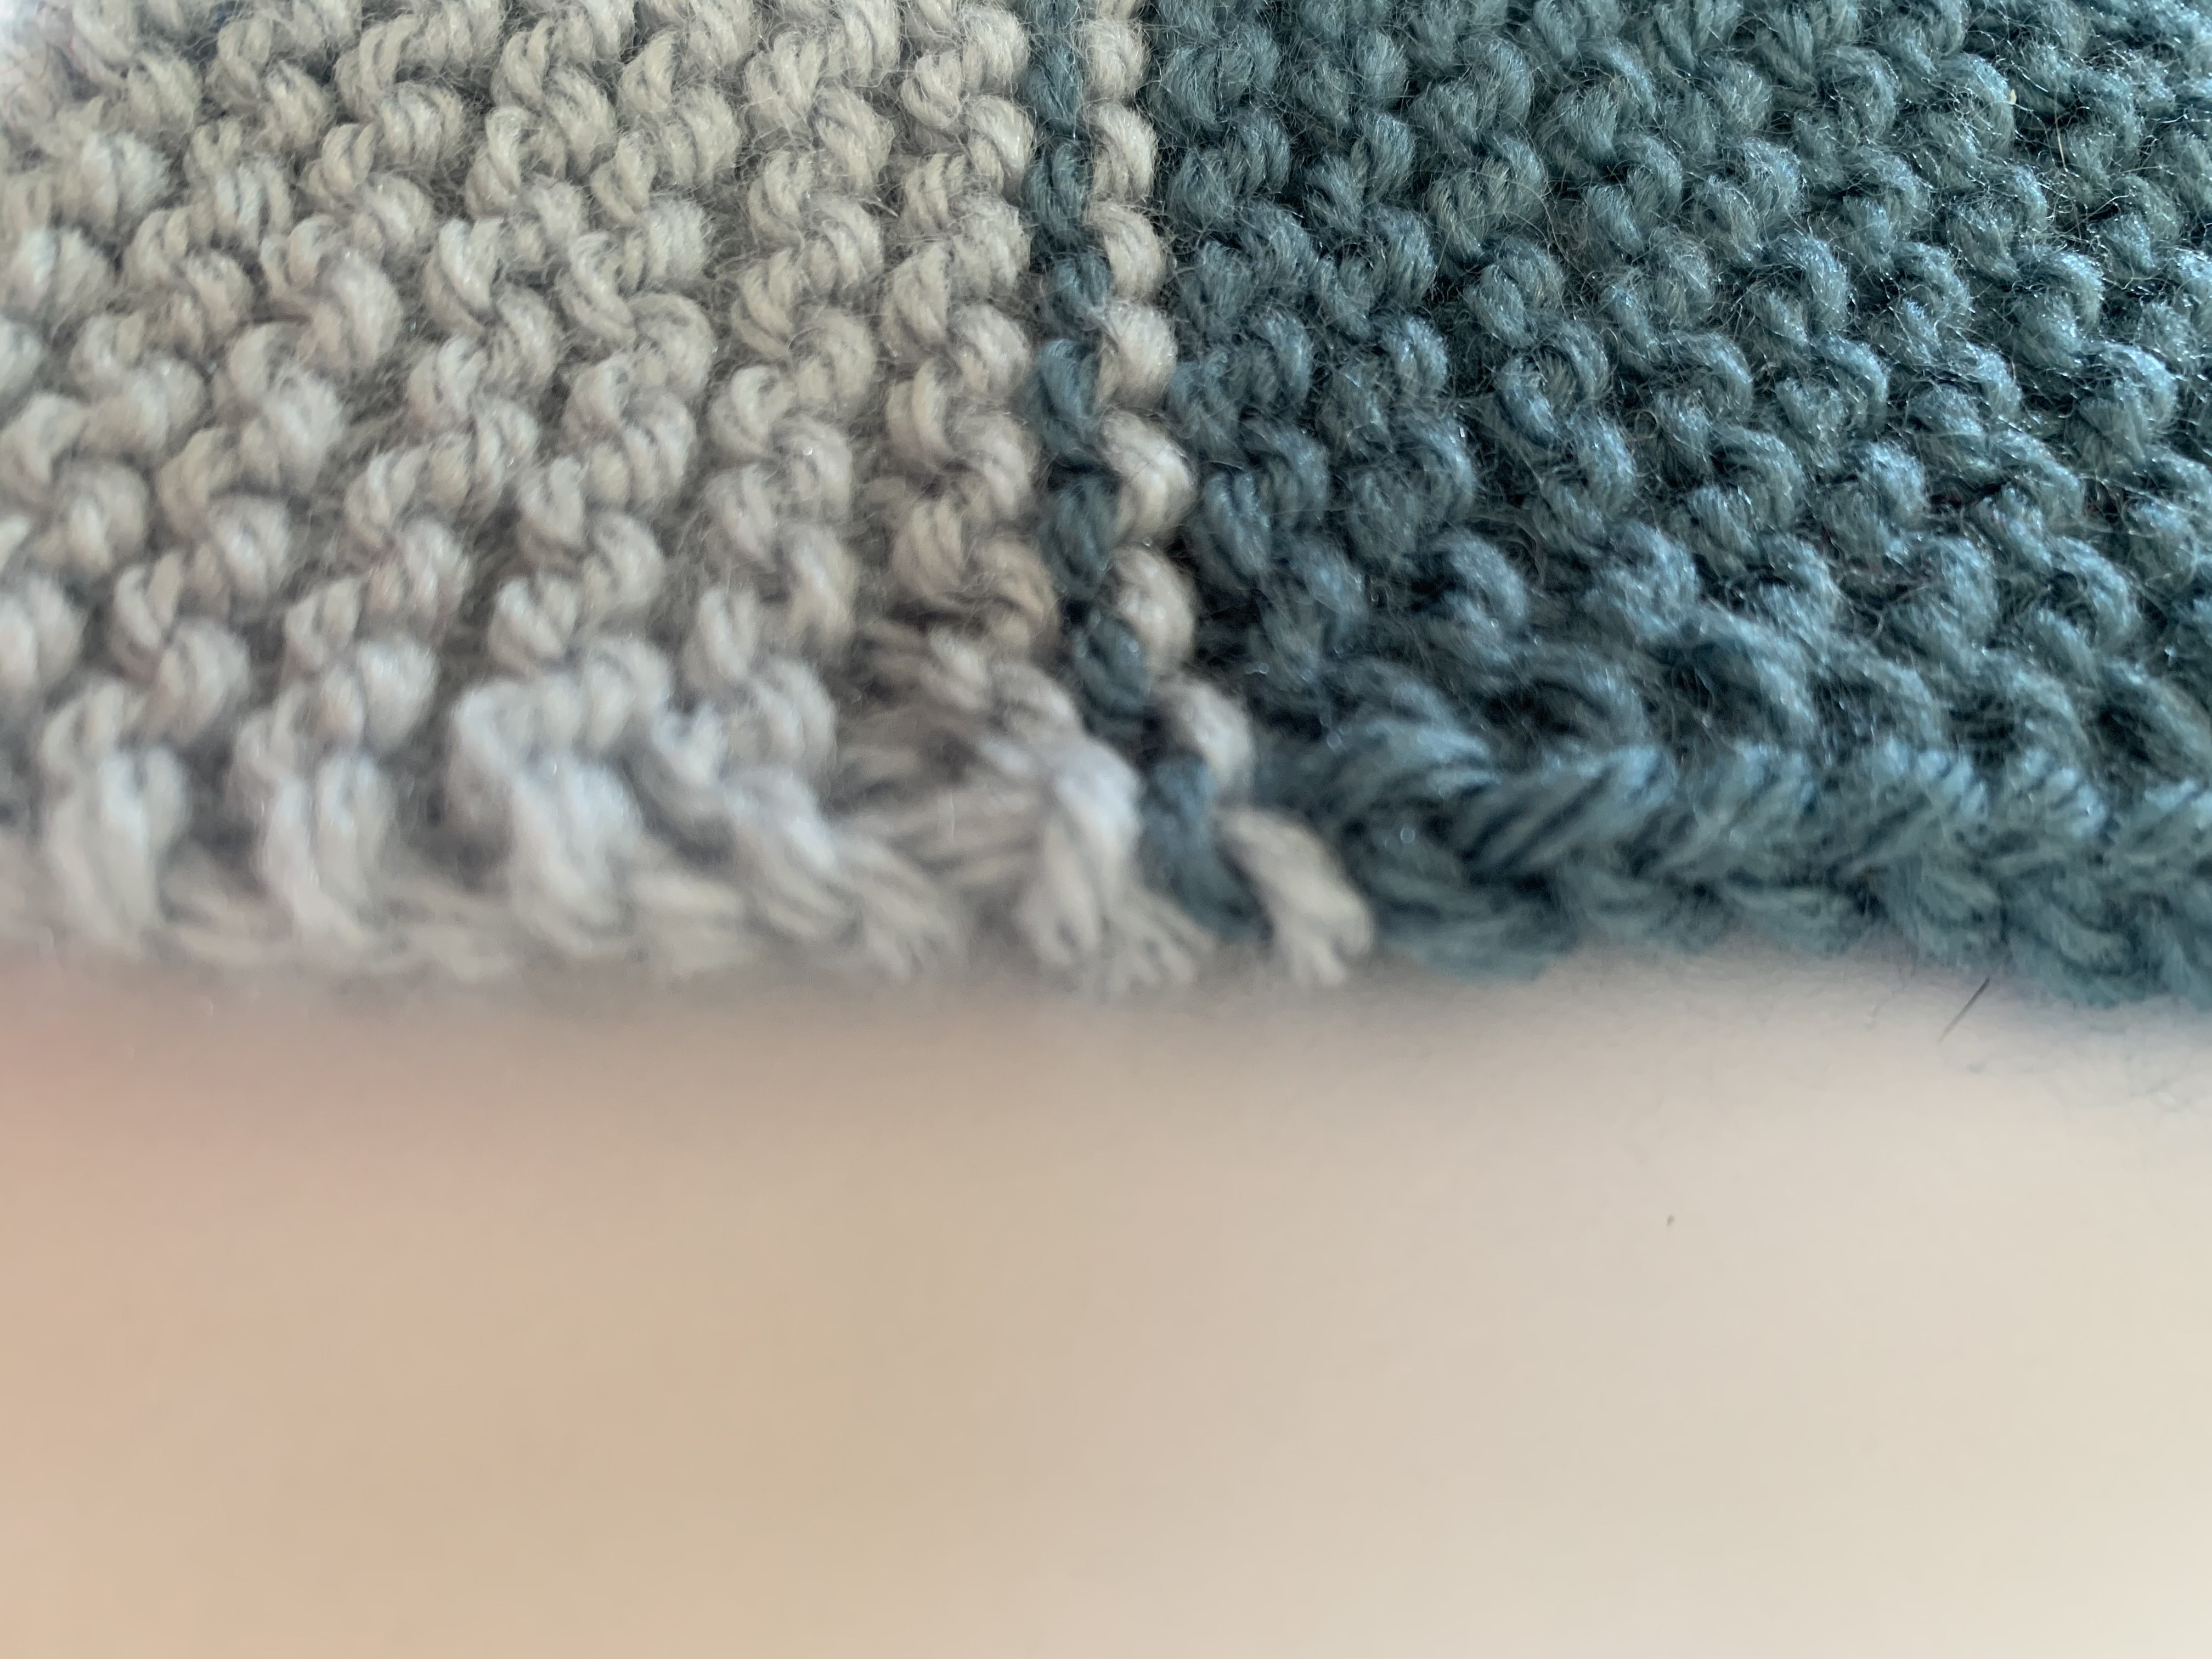
The pattern instructs you to change the color after you’ve stitched a specific length. Do this when the right side is facing you. The wrong side will appear to have an alternating row of colors. Make sure that alternating color change is toward the back when you change colors (this is for the second, third, and fourth colors).
(wrong side/back of work)

Changing colors can feel a little awkward at first. Try holding the tail of the old color against your work. Hold the tail of the new color in your right hand (if you’re right-handed). Then, carefully work the first few stitches. You can gently pull the tails of the old and new color to tighten up the stitches. After I work a couple of rows in the new color, I’ll tie a loose knot of the two colors together to keep the stitches secure. I untie the knot before I weave in the ends.
Choosing Stripe Lengths
This scarf was designed by halving the length for each color. The main color is 32”, the next color is 16”, the next 8” and the last 4” – (32, 16, 8, 4)”.
Math sequences are a fun and easy way to design striped projects. The one pictured here was halved (or doubled if you work from the shortest stripe to the longest). The possibilities are endless. Here are a couple of other options using math sequences:
- Change color based on odd numbers such as 3, 5, 7, or 9 inches. Repeat that twice and you’ll have a scarf that’s 72” long.
- Multiply a run of numbers by 3, such as: 1×3=3, 2×3=6, 3×3=9, 4×3=12. Changing colors every 3, 6, 9, 12 inches would give you 30”. You can repeat the colors in the same order or reverse the order to 12, 9, 6, 3 on the repeat.
After selecting a math sequence to calculate stripe lengths, draw a picture of your project. Select the yarn you are going to use, then use a computer program like Excel or colored pencils and paper to draw a sample of the scarf. This allows you to move the colors around to find the most pleasing combination prior to starting to stitch your project.
Pattern
MC Section
With MC, CO 22 sts.
Row 1: K every st across.
Row 2: Sl1k, k across to last st, p last st.
Rep Row 2 until piece measures 32”.
C1 Section
Next Row: With C1, rep Row 1.
Rep Row 2 until C1 section measures 16”.
C2 Section
Next Row: With C2, rep Row 1.
Rep Row 2 until C2 section measures 8”.
C3 Section
Next Row: With C3, rep Row 1.
Rep Row 2 until C3 section measures 4”.
BO all sts.
Finishing
Weave in all ends.

