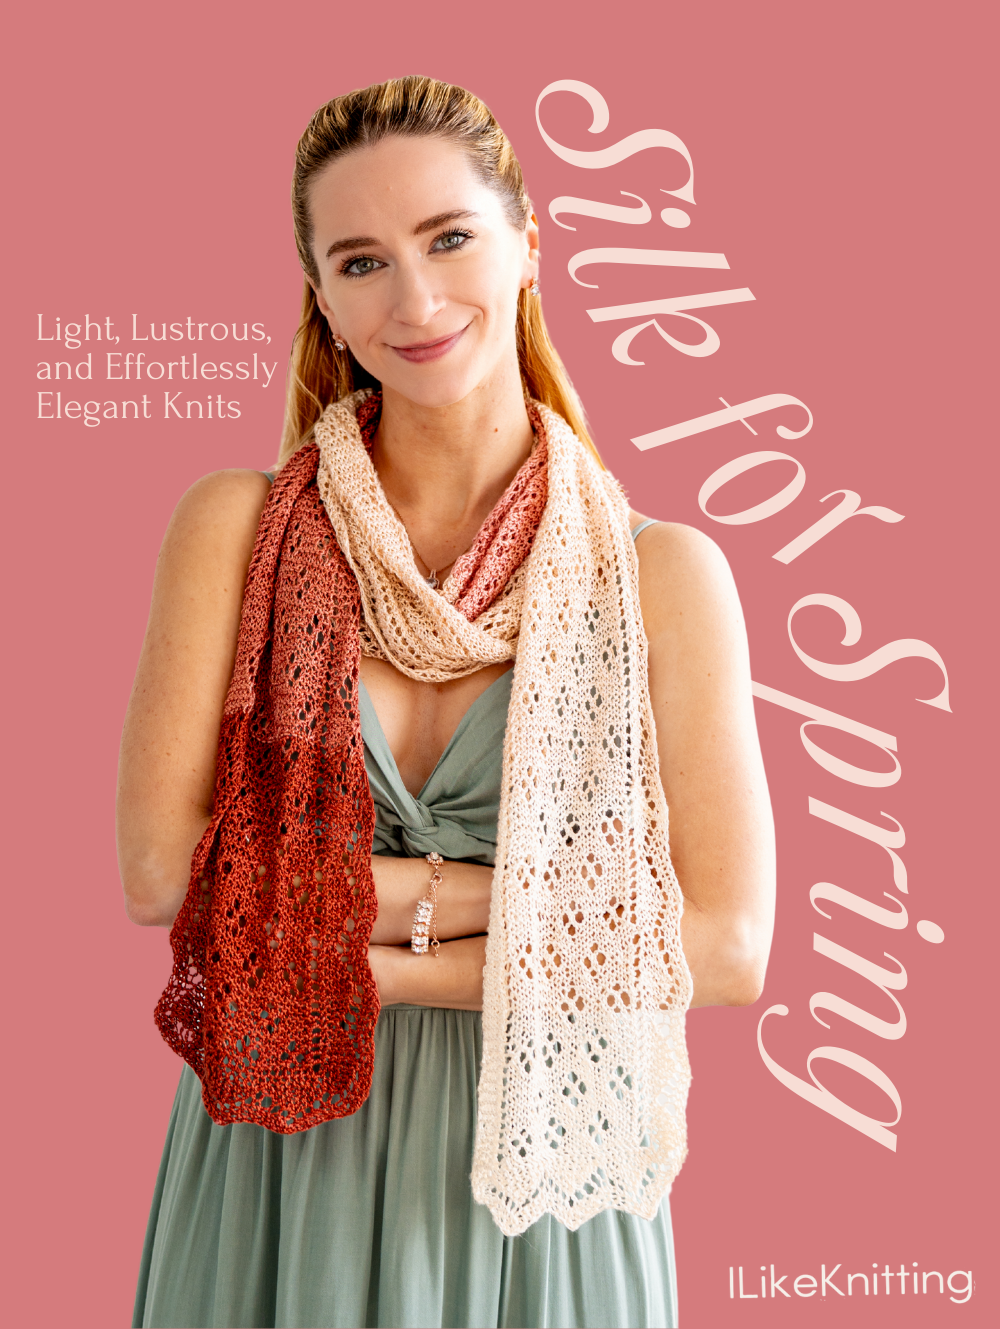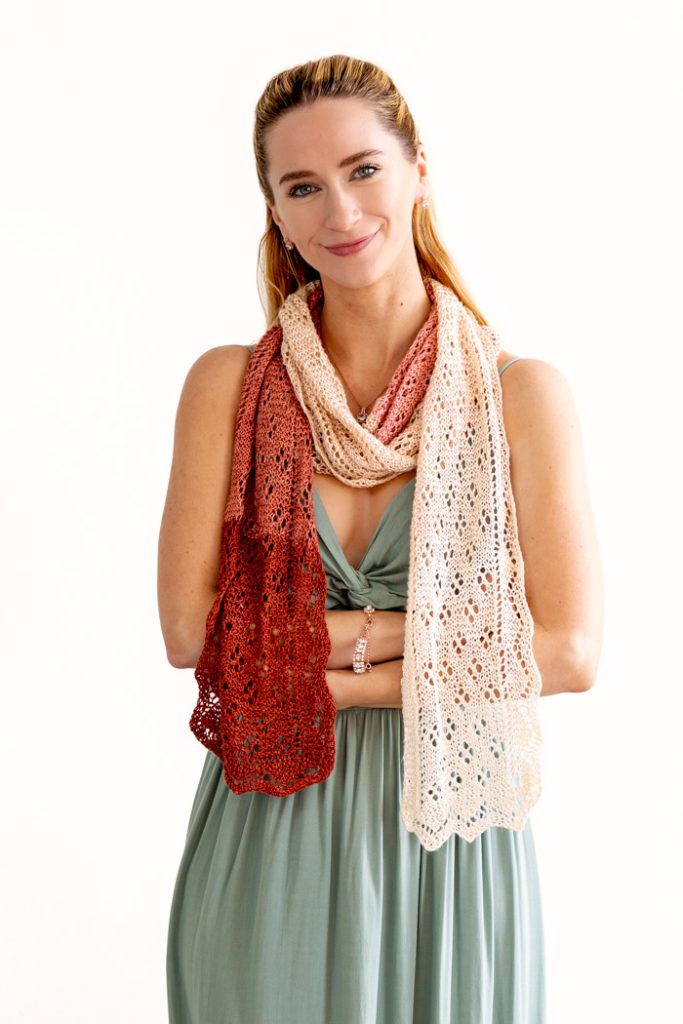
The Rêverie Silk Scarf embodies the elegance and sophistication of traditional Orenburg lacework, beautifully updated with a modern twist. Crafted from a luxurious gradient of buttery silk, this scarf is a stunning accessory for any season, designed to capture the delicate beauty of lace knitting while remaining accessible to knitters of all skill levels.Whether paired with an evening gown or draped over a bridal dress, it adds a subtle yet striking touch of grace. The Rêverie Silk Scarf is the perfect introduction to Orenburg knitting, making it a delightful and elegant addition to any wardrobe.
Skill Level: Easy
Size: 9” x 90”
Gauge: 24 sts and 36 rows = 4” [10 cm] in Garter Stitch after wet blocking
Materials
 Yarn: Expression Fiber Arts Allure Fingering (100% Mulberry Silk; 218 yards [200 meters] / 1.75 ounces [50 grams]): 1 (six-hank) Nymph’s Whisper Hues Gradient Set & 1 (three-hank) Sienna Hues Gradient Kit — [9 hanks total; 1962 yds]
Needles: US size 4 (3.5 mm), 24” circular needle
Notions: Tapestry needle, scissors
Abbreviations
Sl 1 = Slip 1 purlwise with yarn in front
Pattern Notes
The pattern is designed to be worked using a gradient yarn set. The sample shown was worked using 9 colors. You can use any number of colors you prefer, to create a longer or shorter gradient effect. Before beginning the project, arrange your colors in order from lightest to darkest and number them, with #1 being the lightest. This will ensure that the colors don’t become confused during the project, especially if you are working with a gradient set that has very similar colors, as in the case of Nymph’s Whisper, shown here.
Pattern
Getting Started
Determine the desired length of your scarf. Choose a length that is evenly divisible by 9 (or the number of colors you are working with). For our sample, we were looking for a sample with a pre-blocked size of 81 inches long (81 ÷ 9 colors = 9 inches per color). Depending on the yarn you’ve chosen, you will likely get a significant amount of stretch during blocking, so your final scarf will be longer than the beginning estimate. The sample shown grew 9 inches during blocking, for a final measurement of 90” long (10 inches/color section).
Keep in mind that adjusting the length of the scarf will change the amount of yarn required. The yarn set used for this pattern could accommodate 3 finished scarves of this length, or could be used to make a wrap three times the width of this scarf. We wanted to incorporate a long color gradient, from ivory to dark orange, but you could also use just 3 colors of Allure Fingering to create the same size scarf with less color changes.
Section 1
Using color #1; cast on 5 sts using a Provisional Cast On. You will be working back and forth in rows.
Work rows 1-18 using the written instructions below, or the Scarf Border Chart.
ROW 1: Sl 1, K2, yo, K2 (6 sts)
EVEN ROWS 2-10: Sl 1, K to end of row
ROW 3: Sl 1, K2, yo, K3 (7 sts)
ROW 5: Sl 1, K2, yo, K4 (8 sts)
ROW 7: Sl 1, K2, yo, K5 (9 sts)
ROW 9: Sl 1, K2, yo, K6 (10 sts)
ROW 11: Sl 1, K3, yo, K2tog, K4
EVEN ROWS 12-18: Sl 1, K until 2 sts remain, K2tog (9, 8, 7, 6 sts)
ROW 13: Sl 1, K3, yo, K2tog, K3
ROW 15: Sl 1, K3, yo, K2tog, K2
ROW 17: Sl 1, K3, yo, K2tog, K1
Repeat Rows 3-18 two more times, ending with Row 18. (6 sts)
Turn Lower Right Corner:
RIGHT CORNER ROWS 1 & 3: Sl 1, K2, yo, K until 1 st remains. Slip the first stitch on the right needle back to the left needle. Turn work. (7, 8 sts)
EVEN ROWS 2-8: Knit
ROW 5: Sl 1, K2, yo, K to end of row. Slip the first stitch on the right needle back to the left needle. Turn work. (9 sts)
ROW 7: Sl 1, K2, yo, K until 1 st remains. Slip the first stitch on the right needle back to the left needle. Turn work. (10 sts)
ROW 9: Sl 1, K3, yo, K2tog, K to end of row.
Picking up center stitches:
Place the work in front of you, with the right side facing up. The needle holding the active stitches should be on the right. Using the other needle, pick up (but do not knit) 24 sts along the flat edge of the work, working from left to right and beginning with the first slip stitch loop next to the Provisional Cast On. (34 sts)
Note: After picking up your 24 loops, there will be 3 slip stitch loops remaining between your needles. Do not pick these up.
ROW 10: (You should have 10 sts on your right needle and 24 sts on your left needle); Place a marker on the right needle. (Ktbl) twice, place marker, Ktbl until 2 sts remain, place marker, (Ktbl) twice. Do not turn the work.
(Note that by knitting the stitches through the back loop, you will be twisting them. This is intentional.)
Turn Lower Left Corner:
Using your empty (left) needle; remove the scrap yarn and pick up (but do not knit) the 5 sts from the Provisional Cast On, beginning from the edge, so that your needle tips are pointed together to continue knitting.
ROW 10 (continued): Place a marker on the right needle. K5 (39 sts)
Note: The stitches on either sides of the marker sets will be the border stitches (at this time there should be less stitches on the left border than the right). The two stitches contained within each marker set are your eyelet columns, which divide the borders from the center panel. The stitch section contained between the two sets of markers is the center panel of the scarf.
(Tip): Because the RS and WS of this scarf look so similar, it is helpful to choose different color markers for each end of the work, so you can easily identify whether you are beginning a RS or WS row.
LEFT CORNER ROWS 1, 3 & 5: Sl 1, K2, yo, K until 1 st remains before marker. Slip the first stitch on the right needle back to the left needle. Turn work. (6, 7, 8 sts before marker – 40, 41, 42 total)
EVEN ROWS 2-10: Knit to end of row. Turn work.
ROW 7: Sl 1, K2, yo, K to marker. Slip the first stitch on the right needle back to the left needle. Turn work. (9 sts before marker – 43 total)
ROW 9: Sl 1, K2, yo, K until 1 st remains before marker. Slip the first stitch on the right needle back to the left needle. Turn work. (10 sts before marker – 44 total)
Begin Body of Scarf
SETUP ROW (WS): Sl 1, K3, yo, K2tog, K6, K2tog, K until 2 sts remain, K2tog (42 sts)
Note: As you are working the scarf, the number of stitches on the edges will fluctuate, depending on where in the border pattern you are. The number of center stitches will remain constant. Also note that the two edges are reversed, so that when you’re on a RS row, you will be working a RS row on the right border, but a WS row on the left border and vice versa.
Body of Scarf
To work the body of the scarf you may use either the written or charted instructions below.
Every 9 inches (or the length you calculated above), you will switch to the next color in the sequence. You can switch colors at any point in the repeat pattern, just ensure that you always begin a new color on a RS row. Because of the stretchy nature of the lace fabric, it is usually easier to measure in rows/repeats rather than using a ruler. If you establish on your first color how many repeats yields the desired length, you can count repeats going forward, instead of measuring with a ruler. For our sample, there were 5 chart repeats per color section.
Work in pattern until the scarf measures approximately 2 inches shorter than the final desired length, ENDING WITH ROW 14. In the case of our sample, that will be 79 inches.
Written Center
Note: Wherever the term ‘slip marker’ is used, it indicates that the marker should be slipped from the left needle to the right needle.
Row 1 (RS): Sl 1, K3, yo, K2tog, K3, sl marker, yo, K2tog, sl marker, K1, *K3, yo, K2tog, K1; rep from * to next marker, sl marker, yo, K2tog, sl marker, K until 2 sts remain, K2tog (41 sts)
Row 2: Sl 1, K3, yo, K2tog, K3, K until 2 sts remain, K2tog (40 sts)
Row 3: Sl 1, K3, yo, K2tog, K2, sl marker, yo, K2tog, sl marker, K1, *K2, (yo, K2tog) twice; rep from * to next marker, sl marker, yo, K2tog, sl marker, K until 2 sts remain, K2tog (39 sts)
Row 4: Sl 1, K3, yo, K2tog, K2, K until 2 sts remain, K2tog (38 sts)
Row 5: Sl 1, K3, yo, K2tog, K1, sl marker, yo, K2tog, sl marker, K1, *K3, yo, K2tog, K1; rep from * to marker, yo, K2tog, K until 2 sts remain, K2tog (37 sts)
Row 6: Sl 1, K3, yo, K2tog, K1, K until 2 sts remain, K2tog (36 sts)
Row 7: Sl 1, K2, yo, K3, sl marker, yo, K2tog, sl marker, K1, K to next marker, sl marker, yo, K2tog, sl marker, K until 2 sts remain, K2tog (35 sts)
Row 8: Sl 1, K2, yo, K to end of row (36 sts)
Row 9: Sl 1, K2, yo, K4, sl marker, yo, K2tog, sl marker, *K1, yo, K2tog, K3; rep from * until 1 st remains before marker, K1, sl marker, yo, K2tog, sl marker, K to end of row (37 sts)
Row 10: Sl 1, K2, yo, K to end of row (38 sts)
Row 11: Sl 1, K2, yo, K5, sl marker, yo, K2tog, sl marker, *(yo, K2tog) twice, K2; rep from * until 1 st remains before marker, K1, sl marker, yo, K2tog, sl marker, K to end of row (39 sts)
Row 12: Sl 1, K2, yo, K to end of row (40 sts)
Row 13: Sl 1, K2, yo, K6, sl marker, yo, K2tog, sl marker, *K1, yo, K2tog, K3; rep from * until 1 st remains before next marker, K1, sl marker, yo, K2tog, sl marker, K to end of row (41 sts)
Row 14: Sl 1, K2, yo, K to end of row (42 sts)
Row 15: Sl 1, K3, yo, K2tog, K4, sl marker, yo, K2tog, sl marker, K to next marker, sl marker, yo, K2tog, sl marker, K to end of row (43 sts)
Row 16: Sl 1, K3, yo, K2tog, K until 2 sts remain, K2tog (42 sts)
Charted Center
Be sure to keep in mind that when working the RS rows of the scarf (odd numbered rows),
you are working the WS on the left border. When working the WS rows of the scarf (even numbered rows), you are working the RS on the right border. Therefore, when reading the chart symbols, be sure not to mistake knit stitches for purl stitches, when they suddenly change symbols at the last border section of each row. There are no purl stitches in these charts.
Turn Upper Right Corner
Beginning on the RS, immediately after Row 14:
TOP EDGE ROW 1 (RS): Sl 1, K3, yo, K2tog, K3. Slip the last stitch you just knit back to the left needle. Turn work.
ROW 2: K6, K2tog (9 sts remain on this side of marker)
ROWS 3 & 5: Sl 1, K3, yo, K2tog, K2. Slip the last stitch you just knit back to the left needle. Turn work.
ROWS 4 & 6: K5, K2tog (8, 7 sts remain on this side of marker)
ROW 7: Sl 1, K3, yo, K2tog. Slip the last stitch you just knit back to the left needle. Turn work.
ROWS 8: K3, K2tog (6 sts remain on this side of marker)
ROW 9 (begin top border): Sl 1, K2, yo, K2, slip next st to right needle, drop marker, slip stitch back to left needle, K2tog. Slip the last stitch you just knit back to the left needle. Turn work. (8 sts remain on this side of marker)
EVEN ROWS 10-16: K to end of row
ROW 11: Sl 1, K2, yo, K3, K2tog. Slip the last stitch you just knit back to the left needle. Turn work. (8 sts remain on this side of marker)
ROW 13: Sl 1, K2, yo, K4, slip next st to right needle, drop marker, slip stitch back to left needle, K2tog. Slip the last stitch you just knit back to the left needle. Turn work. (8 sts remaining on left needle)
ROW 15: Sl 1, K2, yo, K5, K2tog. Slip the last stitch you just knit back to the left needle. Turn work. (9 sts remaining on left needle)
ROW 17: Sl 1, K3, yo, K2tog, K3, K2tog. Slip the last stitch you just knit back to the left needle. Turn work. (9 sts remaining on left needle)
EVEN ROWS 18-24: K until 2 sts remain, K2tog (1 st decreased on each row)
ROW 19: Sl 1, K3, yo, K2tog, K2, K2tog. Slip the last stitch you just knit back to the left needle. Turn work. (8 sts remaining on left needle)
ROW 21: Sl 1, K3, yo, K2tog, K1, K2tog. Slip the last stitch you just knit back to the left needle. Turn work. (7 sts remaining on left needle)
ROW 23: Sl 1, K3, yo, K2tog twice. Slip the last stitch you just knit back to the left needle. Turn work. (6 sts remaining on left needle)
ROW 25: Sl 1, K2, yo, K2, K2tog. Slip the last stitch you just knit back to the left needle. Turn work. (6 sts remaining on left needle)
EVEN ROWS 26-32: K to end of row
ROW 27: Sl 1, K2, yo, K3, K2tog. Slip the last stitch you just knit back to the left needle. Turn work. (7 sts remaining on left needle)
ROW 29: Sl 1, K2, yo, K4, K2tog. Slip the last stitch you just knit back to the left needle. Turn work. (8 sts remaining on left needle)
ROW 31: Sl 1, K2, yo, K5, K2tog. Slip the last stitch you just knit back to the left needle. Turn work. (9 sts remaining on left needle)
Repeat rows 17-32 once more.
Repeat rows 17-22 once more, dropping all markers as you come to them, then continue immediately into turning upper left corner:
Turn Upper Left Corner
ROW 1 (RS): Sl 1, K3, yo, K2tog twice, place marker, K to end of row (16 sts)
ROW 2 (WS): Sl 1, K3, yo, K2tog, K2, slip the last stitch you just knit back to the left needle. Turn work. (9 sts remain on this side of marker)
ROW 3: K5, K2tog (8 sts remain on this side of marker)
ROW 4: Sl 1, K3, yo, K2tog, K1, slip the last stitch you just knit back to the left needle. Turn work. (8 sts remain on this side of marker)
ROW 5: K4, K2tog (7 sts remain on this side of marker)
ROW 6: Sl 1, K3, yo, K2tog, K1, slip the last stitch you just knit back to the left needle. Turn work. (7 sts remain on this side of marker)
ROW 7: K4, K2tog (6 sts remain on this side of marker)
ROW 8: Sl 1, K3, yo, K2tog, slip the last stitch you just knit back to the left needle. Turn work. (6 sts remain on this side of marker)
ROW 9: K3, K2tog (5 sts remain on this side of marker)
ROW 10: Sl 1, K2, yo, K2, drop marker, K until 2 sts remain, K2tog (12 sts)
Finishing
There are now 12 sts remaining on your needles. Place the first 6 on one needle and the second 6 on the other needle. Cut yarn, leaving a length of yarn for grafting. Using Garter Kitchener Stitch, or the method of your choice, graft the two sets of stitches together.
Weave in all yarn ends. Keep in mind that when working with pure silk yarns, the slippery nature of the yarn makes it easier for tails to come undone as the scarf is worn, so it’s best to weave them in for a good distance, to ensure they will not be able to unravel.
Block scarf to desired size. Depending on your yarn choice, the lace will bloom significantly during blocking. The example shown, which was 81” after knitting, stretched to 90” once wet, for a final measurement of 9” x 90”.