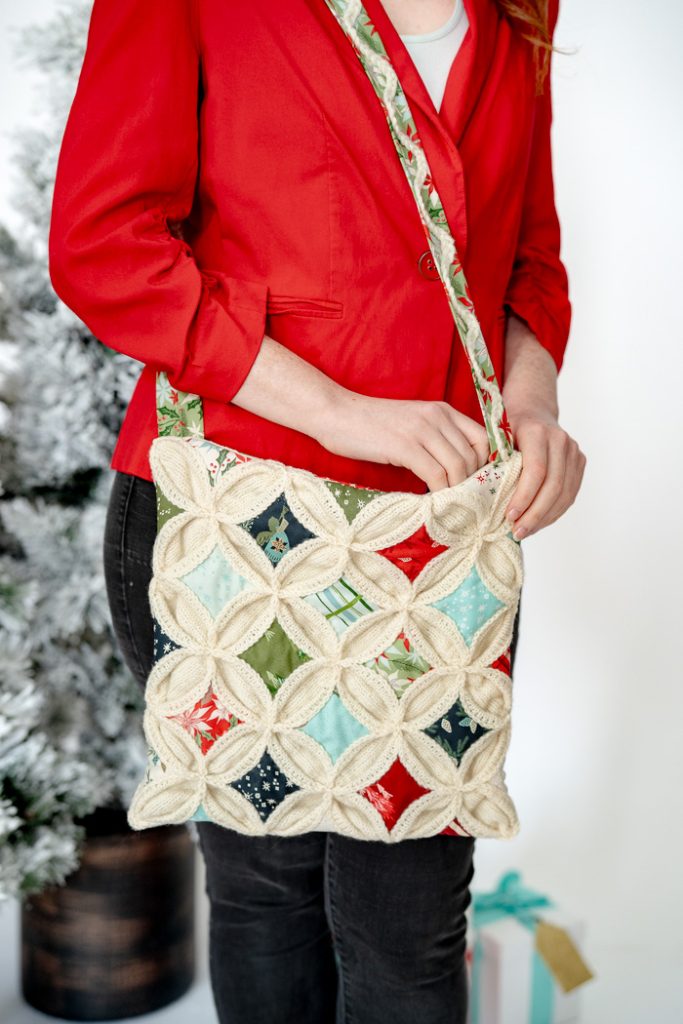
The Winter Cathedral Tote is a delightful project tailored for knitters with a passion for exquisite quilt fabrics and unique gift ideas. Inspired by quilt designs, this tote offers a charming blend of creativity and simplicity, making it ideal for those seeking a rewarding yet manageable project. Created with mini charm squares in mind, it captures the essence of quilting in a knitted format, lending a cozy and festive feel.
Beyond its functionality as a tote, this versatile pattern can be adapted to create a plush holiday pillow, adding a touch of seasonal charm to any space. Whether you choose to knit it as a tote or transform it into a decorative pillow, this project promises a fulfilling knitting experience and a beautiful handmade item that reflects your craftsmanship and creativity.
Time: 1-2 Week Project
Skill Level: Intermediate
Size: 12.5” x 12.5” | (Strap): 42”
Gauge: 21 sts and 36 rows = 4” [10 cm] in St st after wet blocking
Materials
 Yarn: KnitPicks Wool of the Andes Sport Weight (100% Peruvian Highland Wool; 274 yards [250 meters] / 3.5 ounces [100 grams]): Bare (MC 3 hanks)
Needles: US size 3 (3.25mm) double pointed needles and 24” circular needle
Fabrics:
39 mini charm squares from Good News Great Joy Mini Charm Pack by Moda Fabrics (or, 39 – 2.5” x 2.5” squares of assorted fabrics)
¾ yd Good News Great Joy Eucalyptus Joyful Petals (or desired lining fabric)
Notions: 8 stitch markers (one of a different color/style to denote BOR), tapestry needle, scissors, scrap yarn, white/cream sewing thread (to match your yarn color) and sewing needle, sewing pins, sewing machine (optional). Note: A pinnable mat (such as a blocking mat) is helpful for the final assembly.
Abbreviations
Kfbf = Knit into the front, then back, the front again of the next stitch (2 sts increased)
Pattern Notes
Taking its inspiration from quilting; this pattern was designed with Mini Charm Squares in mind. To avoid lots of fabric cutting and unnecessary expense, purchase a pre-cut collection of Mini Charm Squares, which are sized perfectly at 2.5” x 2.5”, for this project. Most Mini Charm packs come with 40-42 squares, which is the perfect amount for this project, with just a teeny bit to spare. If you don’t want to use precut squares, simply cut 39 squares, 2.5” x 2.5” each, from your favorite assorted fabrics.
The bag is made in three parts; first we will knit the white background squares, folding and stitching them together using the Cathedral Window technique, to form the background for our fabrics. Second, we will arrange and stitch the fabric squares in place, to form the decorative pattern. Third, we will put it all together and assemble the bag, with a coordinating fabric lining, strap and zipper closure.
PLEASE NOTE: GAUGE IS IMPORTANT FOR THIS PATTERN, TO ENSURE THAT YOUR KNITTED AND FABRIC COMPONENTS COME TOGETHER PROPERLY.
Pattern
Knitted Squares (make 18 the same)
Note: Wherever the term ‘slip marker’ is used within the pattern, it means to slip the marker from the left needle to the right needle. Do not remove the marker.
Cast on 4 sts on one DPN.
Setup Row: (Kfbf) four times (12 sts). Divide the 12 sts evenly onto 4 DPNs, place a unique marker and join to begin working in the round.
Rnd 1: *(K1, pm) twice, K1; rep from * 3 more times (Make the 1st marker you place a different color/style from the rest. This marker denotes the first needle of the round)
Rnd 2: *K to the next set of markers, M1R, slip marker, K1, slip marker, M1L; rep from * 3 more times, K to end of rnd. (8 sts increased)
Rnd 3: Knit
Repeat Rnds 2-3 until you have 132 sts, ending with Rnd 2. Move your stitches to scrap yarn and lay out (or pin) to measure. Your square should be just shy of 6.5” x 6.5” (after adding the bind off it should be 6.5” exactly). It’s very important that your final squares be 6.5”, so if yours is not, add or remove rounds as needed, until you reach that size. If you have to adjust, be sure to make note of your final stitch count, so you can make all your other squares the same.
Binding Off: After ensuring your square is the proper size, bind off as follows; *K2tog tbl, slip the stitch from the right needle back to the left needle; rep from * to end of bind off.
Weave in both yarn ends. Optionally, you can use the cast on tail to close the center hole, however it’s not necessary to close the cast on hole, as the center of the square will not be visible on the finished bag.
Make 17 more squares the same, then wet block all squares to measurements; 6.5” x 6.5”.
Braided Rick Rack
Cut six lengths of your yarn, each 100” in length. Tie all six together in a knot on one end, then divide into three sets of 2 strands and braid to the end. Secure the end with another knot. Avoid over-tightening the yarn while braiding – you want a fairly thick, flexible braid.
Finishing & Assembly Tutorial
Assemble Knitted Background
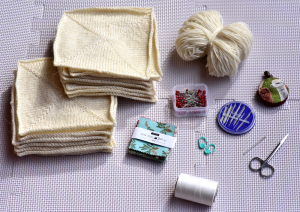
To begin assembly, you will need to gather: 1) your 18 knitted squares, 2) your working yarn, 3) 39 – 2.5” x 2.5” fabric squares, 4) a hand-sewing needle with sewing thread in a color similar to your yarn, 5) locking stitch markers or safety pins, 6) standard sewing pins, 7) a tape measure, 8) scissors, 9) tapestry needle
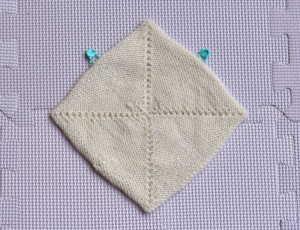
Place your first knitted square WS-up on your work surface, in a diamond orientation ◇. Place a stitch marker (or safety pin) halfway along the top right edge and another stitch marker halfway along the top left edge.
Place another knitted square directly on top of the first, so that the wrong sides are touching.
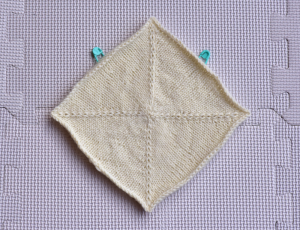
Unlock the stitch markers and insert them through the top square as well, so that the stitch markers are holding both squares together at their halfway points.
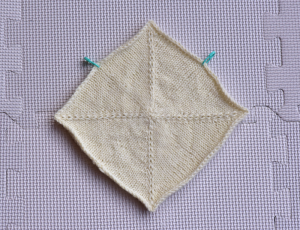
Cut a length of your yarn (about 10”) and thread it onto your tapestry needle. Using a simple running stitch (up-and-down through the fabric), stitch the two squares together in a straight line, working from one stitch marker to the other.
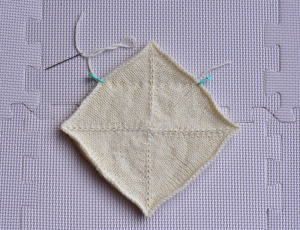
Use a ruler, or any straight edge tool, to be sure that your stitches (highlighted in red) are running in a true straight line from one stitch marker to the next. If your yarn tails are very long, trim them down to just a few inches. You will be securing all your ends together later on.
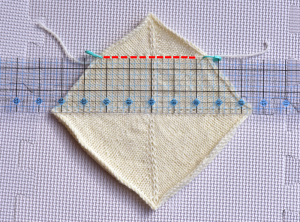
If you pull the top flap of fabric down (denoted in red), the point should come to exactly the center of your square. If it does not, something has been measured or stitched incorrectly. If you encounter a problem, check to be sure your markers are placed at exactly halfway along each edge.
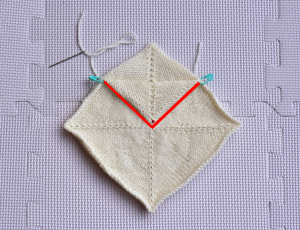
Your two squares are now connected together and when opened and laid RS-up, should look like Image 8. Repeat these steps to join the remaining 16 knitted squares into 2-square units. You should then have nine 2-square units.
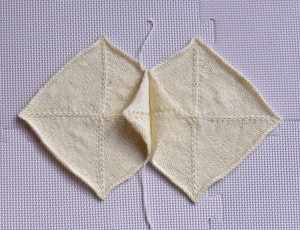
To continue, take one of your 2-square units and place it WS-up in a vertical orientation, as shown. As before, place two stitch markers at the halfway points along the top edges of the top square.
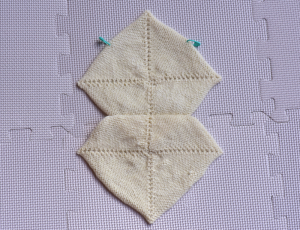
Place another 2-square unit on top, with wrong sides touching and stitch your straight line between the markers. You now have a connected 4-square unit.
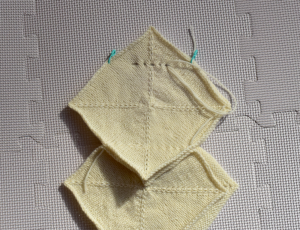
If you place your 4-square unit RS-up, it should look like Image 11.
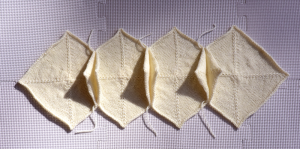
Repeat this process again, to attach another 2-square unit to the 4-square unit. This will create a 6-square unit. Make two more 6-square units the same.

Place one of your 6-square units WS-up, then place another 6-square unit directly on top, with wrong sides touching. Using stitch markers or safety pins; join the two units together at the 5 intersections (circled in red), then place two markers to denote the halfway points on the left and right squares (circled in green).

Using your yarn, stitch a line all the way across (shown in red), to join the two pieces together, using your stitch markers as guides.

As you continue sewing your squares together, you will have lots of triangular flaps on the top side of your fabric. After joining your first two 6-square units together, you now have a 12-square unit, which should look like Image 15a, when placed RS-up. On the reverse side, it should look like Image 15b.
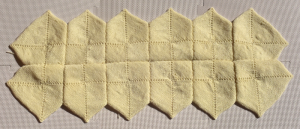
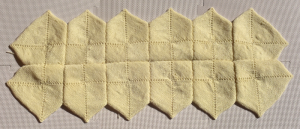
Place your 12-square unit WS-up, then lay your final 6-square unit on top, with wrong sides touching (image 16a). Repeating the same process, clip the two pieces together (image 16b), then stitch a line across (16c). You now have all your knitted squares joined together into an 18-square unit.
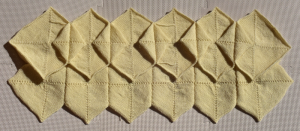
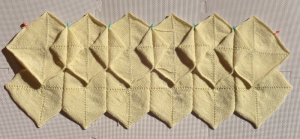
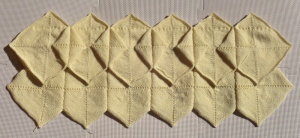
From the RS, your piece should now look like Image 17a. To continue, place the piece WS-up on your work surface. If you have a pinnable board, such as a blocking mat to work on, that will be helpful for the next steps. If everything has been assembled correctly, the knitted increase lines on the WS should all be aligned, to form a square grid as shown in Image 17b.
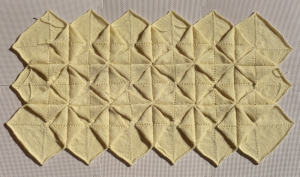
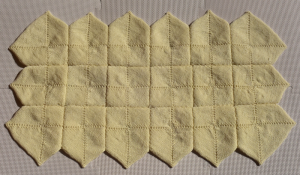
Next, fold all your triangular flaps inwards (this will be the natural inclination of the fabric). Fold four flaps at a time together to form a square and use a pin to hold them all together at the center. You should be placing 18 pins, as shown in Image 18. Circled in red is a closeup image of the pinned center points. Once you’re finished pinning, your work should be rectangular in shape and the knitted increase lines should be aligning to form a grid pattern.
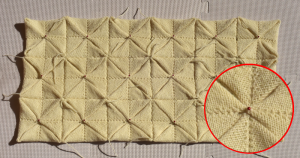
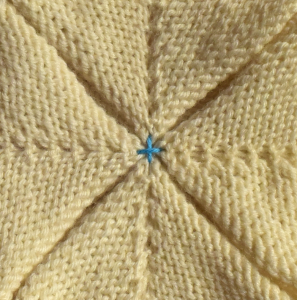
One at a time, remove the pins and use a length of your yarn to form a + shaped stitch at the center of each square, to hold the four points down to the background. This stitching is shown in blue in Image 19, to make it visible. You would be working using your project yarn, not a contrasting color.
When you have finished securing all your center points, your piece will look like Image 20.
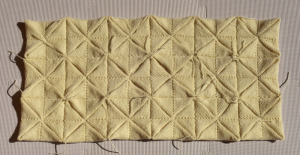
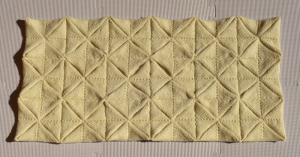
Using a tapestry needle, bring all the yarn tails to the back. You will be able to secure a lot of those tails by tying them together into double knots. Tails that are not close enough to tie together can be woven into the back of the fabric. When you are finished weaving in all your tails, your background piece will be ready to lay out your fabrics and should look like Image 21.
Apply Fabric Squares
Lay your knitted piece RS-up on your work surface. You may find it helpful to pin your knitted fabric down to your board, to keep it flat and uniform. Using the Mini Charm Layout Diagram and Image 22a as guides, lay out your fabric squares RS-up on top of the knitted piece. Your fabric squares will overlap the edge of the knitted piece along the top side, left side and the left half of the bottom. Re-arrange your fabric squares as desired, until you’re happy with the color layout (image 22a). Center each of your fabric squares within the knitted square behind them. You also want to be mindful that any directional fabrics are placed in the same orientation (for example, in image 22b, we have two fabrics with tree designs. We have placed those in an upright, left-leaning orientation – you wouldn’t want to place those fabrics in an orientation where the trees are upside-down).
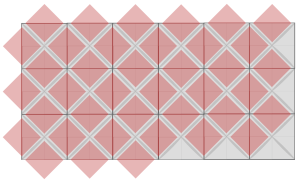
Mini Charm Layout Diagram
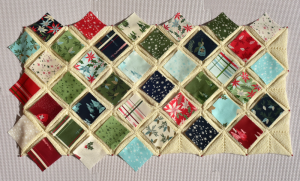
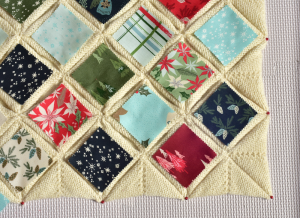
Using pins, you will fold the four knitted flaps from underneath each fabric square and pin them to the top of the fabric square. Image 23 shows how to pin the four sides of each square.

Continue pinning your squares until you have pinned the entire piece, or until you run out of pins (as shown in Image 24). When pinning the fabric squares along the edges, you will only be pinning on the two sides that are touching the knitted fabric.
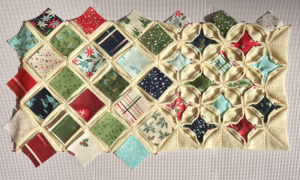
Thread your hand sewing needle with thread and bring your needle up from the underside of the knitted fabric, leaving a 2-3” tail underneath. You will be stitching the four knitted flaps down around all four sides. When you’re stitching, you want to go through all three layers of fabric; the top knitted flap, the fabric square and the knitted background fabric underneath. When you get to the end of the square, bring the needle back down to the underside and tightly double knot the two ends of the thread together to secure. When you’re finished stitching, the square should look like the circled square in Image 25.
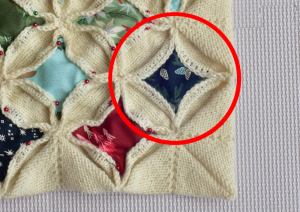
When you’re finished stitching all your flaps down, your knitted and fabric pieces will be connected into one solid unit, as shown in Image 26a. The WS of the piece will look like Image 26b.
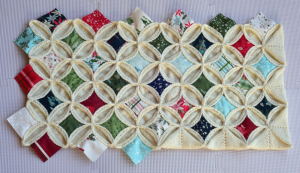
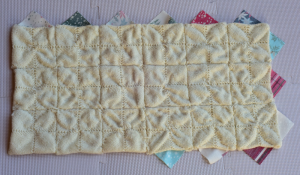
Place your piece WS-up and fold the six fabric squares along the top of the piece down and use a couple stitches to secure them in place on the back of the work.
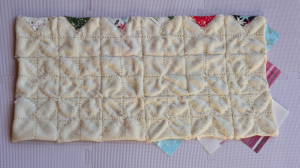
Next, fold your piece in half with right sides touching. Thread your tapestry needle with a long length of yarn and whip stitch along the two open sides, to form the bag shape.
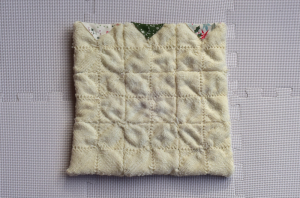
Turn the bag right-side-out again and your bag should look like Image 29.
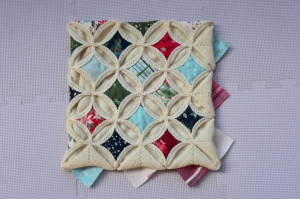
Fold the remaining fabric squares up to the top of the bag and pin the two knitted flaps down over each fabric square.
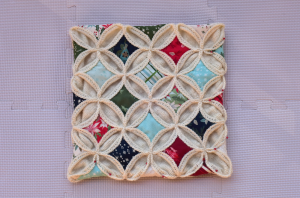
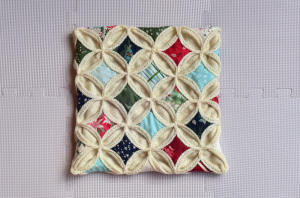
Using your sewing needle and thread, stitch down all the pinned flaps. You have now finished your Cathedral Window layout!
Bag Lining
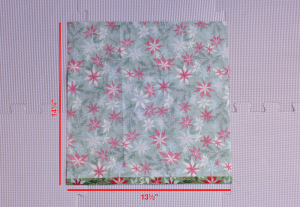
Cut two pieces of your lining fabric; 13.5” x 14.25” each. Place one of them WS-up on your work surface and fold the bottom edge (13.5” edge) up 0.5”. Optionally, use an iron to press the fold.
Fold the edge over again another 0.5” and press.
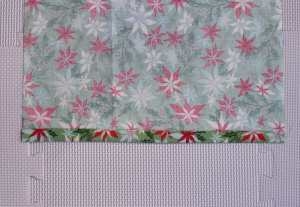
Place one side of your zipper RS-up on the edge of the folded fabric and pin in place, as shown. Using a sewing machine (or by hand, if desired), stitch the zipper to the fabric.
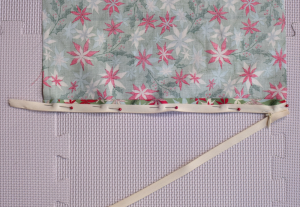
Repeat the same process to fold and stitch the second piece of fabric to the other side of the zipper.
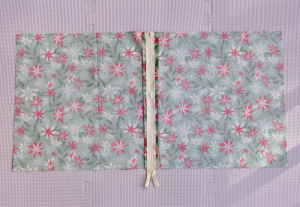
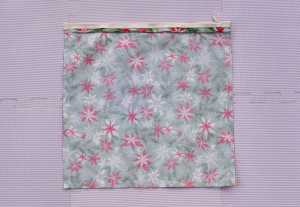
Fold the fabric in half with right sides touching and pin around the three open sides. Using your sewing machine (or by hand), stitch around the three sides using a 0.5” seam allowance.
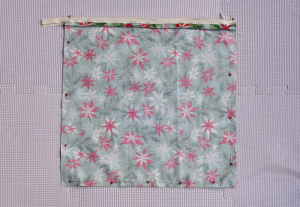
If your zipper is longer than the fabric, you can now trim your zipper to the edge of the fabric.
Strap
Cut a piece of fabric 3.5” x WOF (44” if using the fabric shown). Fold the strip in half lengthwise with right sides touching. Press and pin. (Note: If you anticipate the bag carrying a lot of weight, you may wish to reinforce the strap by applying a layer of interfacing or another layer of thicker fabric to the WS of the strap fabric, for added strength).
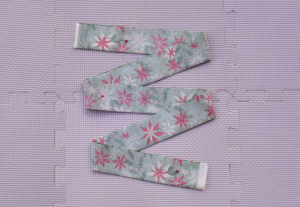
Stitch along the long side of the fabric to form a tube. Turn the tube RS-out and press flat with the seam along the center of the tube, as shown.
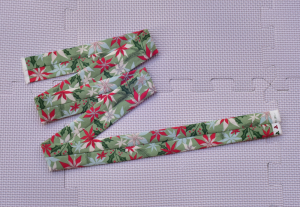
Pin your braid in place on the top of the strap (not on the seam side), in a zigzag pattern.
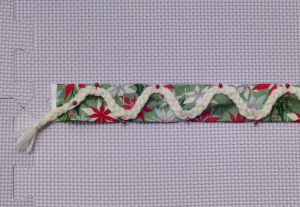
Using your sewing thread, hand-stitch the braid down to the fabric.
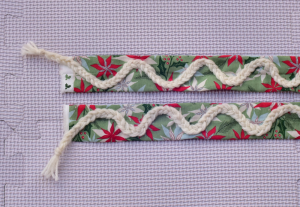
Align one end of the bag strap on the right-hand side of the fabric bag and pin in place. The strap should overlap the bag about 1-1.5”. Stitch the strap to the bag (a sewing machine is best for this, to create stronger stitching). When stitching, you want to be careful not to stitch the actual bag closed.
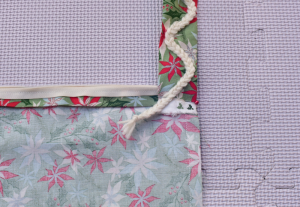
Being careful not to twist the strap; repeat this process to stitch the other end of the strap to the opposite side of the left-hand edge of the bag.
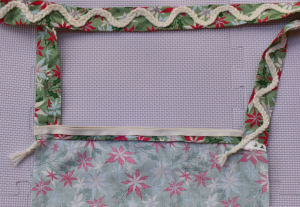
Ensure that the edge of the braid has been stitched down, so it doesn’t unravel, then snip the knot off the end. Repeat on both sides.
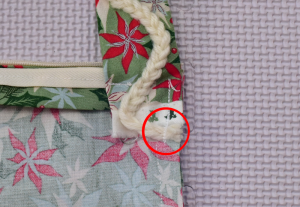
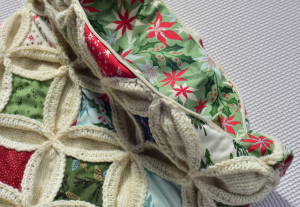
Set the fabric bag inside the knitted bag and pin in place around the opening. Hand-stitch the two bags together all the way around, to complete your bag!


This is fabulous! I have made two Cathedral Window quilts, in the past; however, I never thought of making one with knitting. I LOVE it!
Yay! So glad to hear you love it! – Nicola, Editor