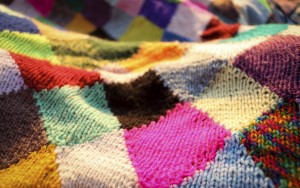
I have always been a big fan of knitted blankets, having slept under one knitted by my mum every night as a child, and they are now my go to project for new babies and wedding presents. One of my favorite things to do in the autumn and winter is to work on a blanket
 I have always been a big fan of knitted blankets, having slept under one knitted by my mum every night as a child, and they are now my go to project for new babies and wedding presents. One of my favorite things to do in the autumn and winter is to work on a blanket that is already big enough to cover my knees, so I can snuggle up under it while it continues to grow. But what about knitting blankets during the summer? Blankets can be warm and heavy projects if you knit them in one piece, but if you knit them as squares, you have a portable project that is perfect for any season.
The first step when embarking on a new blanket project is choosing the yarn. There’s no need to go out and buy all the yarn for a blanket at once, unless you’re planning on making the whole thing in one color of one specific yarn, when it’s generally best to knit the whole thing from one dyelot. Instead you can pick up a few balls here and there; the huge advantage of squares is that the color order isn’t fixed until the end. Or you can go stash diving and rediscover some hidden treasures: a square doesn’t need to take much yarn, and you can use up your scraps easily if you knit striped squares.
Your yarn doesn’t all have to be the same fiber, but you should make sure that all the yarns you use are the same weight, otherwise any heavier squares will pull lighter weight squares out of shape. Another key consideration is to make sure all the yarns can be washed under conditions you’re happy with – the final blanket will have to be washed under the conditions needed for the most delicate square in the blanket. Just make sure that before you join the squares together, you wash and block them all to make sure the squares are at their final size before you add them to the blanket.
Anything goes pattern-wise with a blanket made of squares. You can stick to a single stitch pattern in lots of different colors, or be a bit experimental and try out patterns from a stitch dictionary; you don’t have to knit more than one square in any given pattern, so if you decide you don’t enjoy a particular stitch you can cast off at the end of the square and start a new pattern for the next square. If your squares don’t all end up the same size at the end, you can knit strips to place along the edge of a square to make it fit better with other squares.
Before you join all your squares together, lie them all out in the arrangement you want them in and take a photo so you won’t have to rely on incomprehensible notes on what your plan was at a later date! I like to join my squares together into strips, then join the strips to make the final blanket. You can crochet or sew the squares together. If you’re sewing, use the yarn tails left over from casting the squares on and off, which also saves darning in the ends. I like to use mattress stitch as it leaves a really neat seam, and I find it wears better than whip stitch. If you decide to crochet the squares together, single crochet works well, or use slip stitch for a less obvious seam; in any case, do all the seaming in one color of a similar yarn weight to the rest of the blanket.
After the blanket is seamed, you might wish to add a border. The border can be as simple or as complex as you like: sewen blanket stitch is the most basic, or a round of single crochet. Alternatively you can knit strips and sew them along the edge of the blanket; these strips can be plain garter stitch, or something lacy and more intricate. Pinterest is a great place to look for edging options.
Once you’ve added your border, stand back and admire your work. Or just snuggle up in it, afterall, it’ll be winter by the time you’ve finished your masterpiece.

