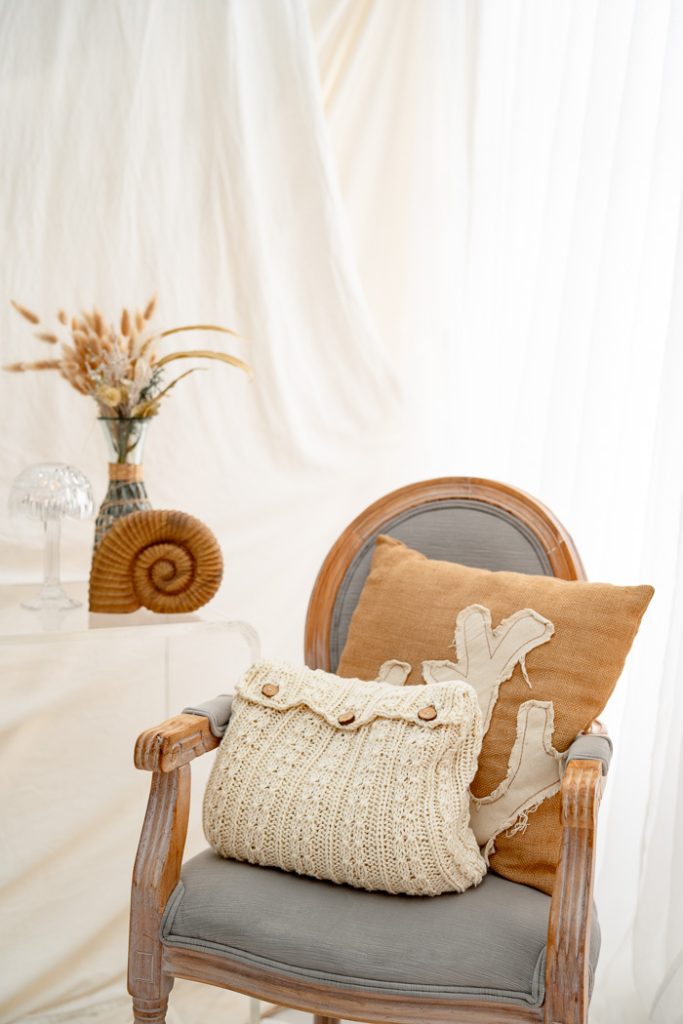
This blanket design draws inspiration from a knitted fabric discovered amidst the belongings of a cherished family member. Originally sized for a baby blanket or pillow, this pattern has been expanded to create a larger version suitable for wrapping the whole family in warmth. The versatile design functions as both a blanket and a pillow, featuring a convenient pouch to maintain its shape when folded.
Time: 1 month project
Skill Level: Easy
SIZES: Pillow: 15”, Blanket 45”x 60”
Gauge: 14 sts and 18 rows = 4” [10 cm] in pattern slightly stretched
Materials
 Yarn: Berroco Comfort Chunky (50% super Fine Acrylic, 50% Super Fine Nylon; 150 yards [138 meters] / 3.5 ounces [100 grams]):
Barley 5703 14 balls
5 Bulky
Needles: US size 10.5/ 6.5 mm, 24” straight and circular needles
Notions: Removable marker for marking right side, stitch holder, tapestry needle, three 1” buttons
Abbreviations
Kfb: knit into both the front and the back of the stitch. 1 sts increase.
Special Stitches
Right Twist (RT): Stick the right hand needle knit wise through the front of the second stitch and knit through it. Leave all stitches on the left needle. Stick the right hand needle through the first stitch knit wise and knit the stitch normally. After both stitches are complete, drop both off of the left hand needle.
Pattern Notes
The main body of the blanket is worked from side to side until it is to length. The blanket is then bound off except for the portion of stitches that will be used to create the pillow pouch. After the pillow pouch is complete, it will be seamed to the blanket.
Pattern
Cast On 158 sts loosely.
Row 1 (RS): S1wyif, p1, [k1, p2, k4, p2] x17, k1, p1, k1
Row 2 (WS): S1wyif, k1, [p1, k2, p4, k2] x17, p1, k2
Row 3 (RS): S1wyif, k1 [k1, p2, RTx2, p2] x17, p1, k1
Row 4 (WS): Same as Row 2
Work rows 1-4 until the blanket measures 60”, ending with a Row 4.
Pouch
BO 52 sts, work the next 54 sts in pattern, BO the remaining 52 sts. Break yarn.
Beginning on the WS and leaving a long tail, work the following 4 rows until the pouch measures 17.5” long, ending with a Row 3.
Row 1 (WS): [p2, k2, p1, k2, p2] x6
Row 2 (RS): k2, [p2, k1, p2, RTx2] x5, p2, k1, p2, k2
Row 3 (WS): Same as Row 1
Row 4 (RS): k2, [p2, k1, p2, k4] x5, p2, k1, p2, k2
Button Hole Row 1 (RS): [k2, p2, k1, p2, ssk, yo, k2tog, p2, k1, p2, k2] x3. (51 sts)
Button Hole Row 2 (WS): [p2, k2, p1, k2, p2, kfb, p2, k2, p1, k2] x3. (54 sts)
Work pouch Rows 2 and 3 once more, then BO all stitches in pattern.
Finishing
Weave in all ends. Block to measurements.
Fold the pouch so the right sides are facing. Seam the pouch along both sides approximately 15” from the blanket edge. Approximately 3” will be unjoined on both sides.
With the wrong sides facing, fold the blanket in thirds longways. Beginning at the edge without the pouch, fold approximately 10” and keep folding until it reaches the other end. Flip the blanket into the pouch. Use the button holes to approximate where to sew the three buttons.


Why do you need 5 buttons, only 3 shown in pictures?
Hi Marilyn! Thanks for bringing this to our attention, it should indeed be three buttons. Happy knitting! – Nicola, Editor